
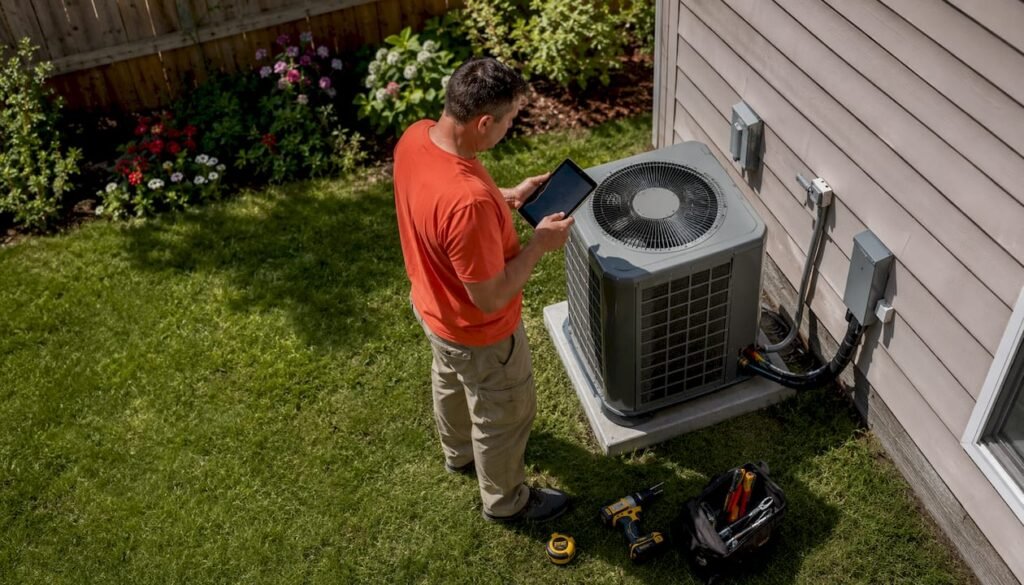
TL;DR:
- Attempting a full AC installation alone is risky due to legal, safety, and warranty concerns. Homeowners can assist with site prep and basic tasks but must rely on licensed technicians for refrigerant, electrical, and commissioning work. Proper installation, including load calculation and documented testing, can reduce energy use by over 30% and ensure long-term system performance.
Don’t attempt a full AC installation on your own. Electrical hookups, refrigerant handling, and final commissioning are legally and technically off-limits for unlicensed homeowners. EPA Section 608 requires certified technicians to recover and handle refrigerants, and the National Electrical Code governs the 240V circuits and breaker sizing your system depends on. Skipping those rules risks fires, fines, voided warranties, and denied insurance claims.
What you can do safely: clear and level the outdoor pad area, protect attic insulation with plywood walk boards, route basic condensate piping, swap a compatible thermostat, and clean debris from the old equipment before removal. These are real contributions that speed up the install day and reduce labor charges.

According to ACCA quality standards, skipping proper installation procedures can raise a home’s annual energy use by 30% or more. That figure alone is reason enough to take every step seriously.
Pro Tip: Print a short install-readiness checklist and confirm every item before delivery day. Contractors who arrive to an unprepared site often charge for the extra time, and some reschedule entirely.
Table of Contents
- What are the main AC installation tips you need to know first?
- How do you assess your current system and size the new one correctly?
- What tools and materials should you have ready before install day?
- How should you prepare the indoor and outdoor site before the crew arrives?
- What should you expect during the indoor air handler installation?
- How do you place and mount the outdoor condenser correctly?
- What electrical and refrigerant work requires a licensed technician?
- How do you verify a correct installation with a commissioning checklist?
- What permits, warranty rules, and safety steps do you need to know?
- What are the most common AC installation mistakes and how do you avoid them?
- What does a typical AC installation cost and how long does it take?
- Which tasks can you do yourself and which require a licensed contractor?
- Why does installation quality matter as much as equipment quality?
- Key Takeaways
- What homeowners should actually expect from a reputable installer
- Kcaircontrol makes code-compliant AC installation straightforward for Kansas City homeowners
- Useful sources for homeowners who want to go deeper
What are the main AC installation tips you need to know first?
A successful installation follows a clear sequence. Here is the full flow with realistic time expectations for each phase.
- Assessment and Manual J load calculation — 1–2 hours; done before equipment is ordered.
- Site preparation — 1–2 hours; homeowner can complete most of this in advance.
- Indoor air handler / evaporator coil installation — 1–2 hours on site.
- Outdoor condenser placement and mounting — 30–60 minutes.
- Line set runs and brazing — 1–2 hours; licensed tech only.
- Electrical connections, disconnect, and thermostat wiring — 1–2 hours; licensed tech only.
- Evacuation and refrigerant charging — 1–2 hours; licensed tech only.
- Testing, startup, and commissioning — 30–60 minutes.
- Final paperwork, permit inspection, and homeowner walkthrough — 30 minutes to several days depending on your municipality.
Standard central or split-system installs typically run 2–8 hours on site when the site is prepared and no duct or electrical surprises appear. Complex jobs with duct modifications or new electrical service can stretch across multiple days. Permit pulls and inspector scheduling add time that no contractor can fully control, so build a buffer into your planning.
How do you assess your current system and size the new one correctly?
Start with a Manual J load calculation. Not a square footage estimate, not a match to the old unit’s tonnage. A real Manual J.
Manual J is the industry-standard method for calculating a home’s precise heating and cooling load. It accounts for insulation R-values, window U-factors, orientation, ceiling height, occupancy, local climate data, and duct condition. A simple square footage rule ignores all of that, and the result is usually an oversized system that short-cycles and causes premature compressor failure. Short-cycling also leaves humidity uncontrolled, which is a comfort problem that no thermostat setting fixes.
Before a contractor visits, gather the following:
- Floor plans or rough room dimensions for each level
- Window count, approximate size, and which direction they face
- Photos of attic insulation, duct runs, and air handler access
- Past 12 months of energy bills
- Age and condition of existing ductwork
Pro Tip: Ask every contractor to provide a signed Manual J report with their written quote. Many utilities and local building departments now require it for permit approval. A contractor who refuses or can’t produce one is a contractor worth reconsidering.
Duct condition matters as much as equipment selection. ENERGY STAR’s quality installation guidance is direct: unassessed ductwork frequently causes comfort problems and premature failures even when the new equipment is correctly sized. A duct assessment should happen before you finalize any equipment order. For a deeper look at how load calculations affect efficiency, the HVAC load calculation guide from Kcaircontrol walks through the key inputs in plain language.
What tools and materials should you have ready before install day?
Homeowners should only handle non-electrical prep tools. Brazing rigs, vacuum pumps, refrigerant scales, and manifold gauges belong exclusively to your licensed technician.
Homeowner-safe tools and materials:
- Basic hand tools (screwdrivers, adjustable wrench, utility knife)
- 4-foot level for checking pad and air handler
- Drill and bits for thermostat wire routing
- Silicone caulk and foam sealant for line-set penetrations
- PVC pipe and fittings for condensate routing
- Plywood sheets (3/4 inch) for attic walk boards
- Safety glasses, work gloves, and an N95 dust mask
Pro-only equipment (do not purchase or attempt to use):
- Brazing torch and nitrogen purge setup
- Vacuum pump (must pull to below 500 microns)
- Refrigerant recovery machine
- Refrigerant scales and cylinders
- HVAC manifold gauges calibrated to manufacturer charts
- Flow hood or pitot traverse kit for airflow measurement
EPA Section 608 prohibits unlicensed refrigerant recovery and handling. Beyond the legal risk, spark-producing tools near pressurized refrigerant lines are genuinely dangerous. If a contractor offers to let you handle any of those items, decline.
How should you prepare the indoor and outdoor site before the crew arrives?
Good site prep is the single easiest way to prevent install-day delays and long-term equipment problems. Crews that arrive to a prepared site work faster, and faster work means fewer labor hours billed.
Outdoor preparation:
- Clear a 3–4 foot path to the condenser location for equipment and tools
- Confirm the concrete pad is level or install a pre-formed pad before arrival
- Maintain at least 24 inches of clearance on all sides of the condenser location
- Keep the unit at least 2 feet from eaves, gutters, and walls
- Remove any landscaping, mulch, or debris within the clearance zone
Indoor preparation:
- Clear the attic or crawl space path to the air handler
- Lay plywood walk boards over batt insulation to protect R-value (walking directly on batt insulation compresses it permanently)
- Mark stud bays for thermostat wire runs and use pilot drill holes rather than nailing through drywall
- Confirm the condensate drain has a clear path to a floor drain or exterior exit
| Placement factor | Requirement |
|---|---|
| Condenser side clearance | 24 inches minimum on all sides |
| Condenser to eaves/gutters | 2 feet minimum |
| Condensate line slope | 1/4 inch drop per foot toward drain |
| Attic insulation protection | Plywood walk boards over all batt insulation |
Pro Tip: Photograph tight access points, narrow attic hatches, and any obstacles before the crew arrives. Share those photos with your installer. Surprises that appear on install day often turn into change orders.
What should you expect during the indoor air handler installation?
Homeowners can assist with positioning, duct access, and condensate routing. Brazing, refrigerant lines, and high-voltage wiring are not homeowner tasks, full stop.
Here is the sequence a qualified installer follows:
- Remove the old evaporator coil and air handler, and safely recover any remaining refrigerant.
- Fit the new coil to the air handler and confirm it seats without stressing the duct connections.
- Secure the drain pan, slope the condensate line at 1/4 inch per foot, and verify it drains freely.
- Seal all duct connections at the air handler with mastic or UL 181-rated tape.
- Align and secure the indoor blower access panels before moving to the outdoor work.
During the install, request these verifications from your technician:
- Condensate drains completely within 60 seconds when tested with a cup of water
- The coil fits without pulling or compressing the supply plenum
- All access panels are secured and the unit is level
Never energize the system until the technician has completed evacuation and refrigerant charging. Powering up with wet lines or an incorrect charge can destroy a compressor within minutes. That damage is rarely covered under warranty when the cause is premature startup.
For a broader overview of the full installation process, Trane’s HVAC installation guide outlines what a professional service should include from site assessment through final walkthrough.
How do you place and mount the outdoor condenser correctly?
The outdoor unit must sit level, have proper clearance, and rest on a hardened surface. Small errors here compound over years of operation.
- Use a bubble level on all four sides of the condenser. Even a two-inch tilt can stress compressor bearings over time.
- Confirm 24 inches of clearance on all sides and 2 feet from eaves or walls.
- Place the unit on a concrete pad or manufacturer-approved elevated brackets, never directly on soil or gravel.
- Verify the electrical disconnect is mounted within line-of-sight of the condenser, as required by the NEC.
- Check that no landscaping, fencing, or HVAC exhaust from another unit restricts the discharge airflow.
After placement, walk around the unit and look for anything that could block airflow in the next few seasons: fast-growing shrubs, downspout extensions, or mulch beds that creep toward the pad.
Pro Tip: Ask your installer to bolt the condenser to the pad using manufacturer-approved anchor hardware, or to install rubber vibration isolators under the feet. Both reduce noise transmission into the home and prevent the unit from walking on the pad over time.
What electrical and refrigerant work requires a licensed technician?
Everything involving 240V circuits, breaker sizing, and refrigerant is licensed-tech territory. This is not a gray area.
Required pro actions on the electrical side:
- Install copper conductors sized to the nameplate Minimum Circuit Ampacity (MCA)
- Install a correctly sized breaker per manufacturer specifications to prevent arc faults and fires
- Mount a fused disconnect within sight of the condenser
- Complete all thermostat low-voltage wiring and verify compatibility at startup
Required pro actions on the refrigerant side:
- Braze line sets with a nitrogen purge flowing to prevent oxidation inside the copper
- Evacuate the system to below 500 microns and hold that vacuum to confirm no leaks
- Weigh in the factory refrigerant charge using calibrated scales
- Document the refrigerant type, quantity, and recovery actions per EPA Section 608
What you can do to prepare:
- Confirm the electrical panel has an open breaker slot of the correct amperage
- Clear a 30–60 minute window for the electrician or inspector
- Keep children and pets away from the work area during electrical and refrigerant phases
Request written documentation of the refrigerant handling. EPA Section 608 requires certified technicians for this work, and that paperwork protects you if a warranty or insurance question arises later.
How do you verify a correct installation with a commissioning checklist?
Commissioning is the proof. Ask for the measurements in writing before you sign off.
The ENERGY STAR HVAC Functional Testing Checklist specifies the targets that separate “it runs” from “it performs to spec.” Here is what to request:
- Airflow: 350–400 CFM per ton, verified with a flow hood or pitot traverse.
- Temperature split: 16–22°F difference between supply and return air after 15 minutes of operation.
- Static pressure: Below 0.5 in. w.c. across the air handler.
- Evacuation reading: Below 500 microns, held for a minimum of 15 minutes.
- Condensate drain test: Drains completely within 60 seconds.
- Superheat and subcooling: Matched to the manufacturer’s chart for the actual refrigerant charge.
- Startup amp draw: Recorded and compared to nameplate data.
Low airflow (below 350 CFM per ton) almost always points to duct leaks or a restricted filter. An incorrect refrigerant charge causes icing on the coil or high head pressure, both of which shorten compressor life. If a technician cannot produce these numbers, the commissioning was not completed.
What permits, warranty rules, and safety steps do you need to know?
Pull permits for any new installation or major system alteration. Most municipalities require it, and skipping this step can create problems when you sell the home or file an insurance claim.
- Check your local building department’s website before work begins to confirm permit requirements.
- Confirm your contractor pulls the permit and provides the inspection receipt.
- Keep all installation paperwork: the permit, the commissioning sheet, the Manual J report, and the equipment warranty registration.
- Many manufacturers void warranties for installations performed by uncertified technicians. Ask for NATE certification or equivalent credentials in writing before work starts.
- Verify that the installer’s liability insurance covers the work performed.
Pro Tip: Photograph the equipment nameplate and the signed commissioning sheet on install day. Store those images in a dedicated home-records folder. You will need them for warranty claims, insurance questions, and future service calls.
Electrical requirements from the nameplate, including MCA and maximum overcurrent protection, are mandatory. Carrier’s installation guidance is clear that incorrect breaker sizing risks arc faults and voids coverage.
This article provides general information for homeowners and is not a substitute for professional advice. Confirm current permit requirements, code rules, and warranty terms with your local authority and a licensed HVAC contractor for your specific situation.
What are the most common AC installation mistakes and how do you avoid them?
Most callbacks trace back to a short list of avoidable errors. Knowing them in advance lets you catch problems before you sign off.
- Skipping Manual J: Leads to oversized equipment, short-cycling, poor humidity control, and early compressor wear.
- Poor brazing or pinhole leaks: Refrigerant escapes slowly, performance drops, and the system eventually fails. Nitrogen purge during brazing prevents internal oxidation.
- Wrong line-set diameter: Undersized copper restricts flow and raises head pressure; oversized lines cause oil return problems.
- Airflow below 350 CFM per ton: Usually caused by duct leaks, a dirty coil, or a mismatched blower speed. Coil icing is a common symptom.
- Inadequate condensate slope: Less than 1/4 inch per foot causes standing water, mold growth, and overflow shutdowns.
- Unsealed duct connections: Small gaps at 0.5 in. w.c. can leak significant conditioned air into unconditioned spaces, wasting energy and reducing comfort.
- Miswired thermostat: Incorrect terminal assignments cause the system to run in the wrong mode or not respond at all.
Never let a contractor size equipment by eyeballing the old unit’s tonnage. Never accept finger-tight refrigerant caps as a finished connection. And never sign a handoff form without receiving actual test numbers. For a broader look at what causes systems to fail early, the common HVAC failure causes resource from Kcaircontrol covers the patterns that show up most often in the field.
In the first 30 days after install, check the condensate pan for standing water, listen for short-cycling (the unit running for less than 5 minutes before shutting off), and verify that supply registers feel noticeably cooler than room air.
What does a typical AC installation cost and how long does it take?
Standard central or split-system installs run 2–8 hours on site. Complex jobs with duct modifications, new electrical service, or long line-set runs can stretch across two days or more.
| Job type | Typical on-site time | Primary cost drivers |
|---|---|---|
| Standard equipment swap | 2–4 hours | Tonnage, SEER2 rating, labor rate |
| Swap with duct repairs | 4–8 hours | Duct materials, sealing labor |
| New electrical service | Add 2–4 hours | Panel work, conduit, permit |
| Long line-set run (over 20 ft) | Add 1–2 hours | Copper cost, brazing time |
| Permit and inspection | Add 1–5 business days | Municipality processing time |
Cost drivers to discuss with every contractor:
- Equipment tonnage and SEER2 rating
- Duct repair or replacement scope
- Line-set length and routing complexity
- Required electrical upgrades (panel, breaker, disconnect)
- Local labor rates and permit fees
Get at least three detailed, itemized quotes. A quote that bundles everything into one line is harder to compare and easier to pad. Regional labor rates vary considerably across the U.S., so a quote that seems high in one market may be standard in another. For context on when upgrading to higher-efficiency equipment pays off, the AC upgrade guide from Kcaircontrol breaks down the efficiency and cost tradeoffs clearly.
Which tasks can you do yourself and which require a licensed contractor?
Homeowner tasks are limited to non-electrical prep and access work. Anything involving refrigerant, brazing, 240V circuits, or commissioning requires a licensed HVAC contractor.
| Homeowner-acceptable tasks | Licensed-contractor tasks |
|---|---|
| Clear and level the outdoor pad area | Manual J load calculation |
| Lay attic walk boards and protect insulation | Refrigerant recovery and charging |
| Route condensate PVC piping (no soldering) | Brazing line sets with nitrogen purge |
| Swap a compatible thermostat (low-voltage only) | 240V electrical hookup and breaker installation |
| Clean debris from old equipment before removal | System evacuation to below 500 microns |
| Photograph nameplate and document serial numbers | Final commissioning and startup verification |
Before hiring, ask every contractor these questions:
- Do you pull the permit, or is that my responsibility?
- Will you provide a signed commissioning sheet at handoff?
- Are you EPA Section 608 certified for refrigerant handling?
- Can you show NATE certification or equivalent credentials?
- Does your quote include haul-away of the old equipment?
A contractor who hesitates on any of those questions is worth pressing further. Get the scope of work in writing before the crew arrives, and do not sign a completion form until you have the commissioning numbers in hand.
Why does installation quality matter as much as equipment quality?
ACCA’s quality installation standards put it plainly: skipping proper installation procedures can increase a home’s annual energy consumption by 30% or more. That is not a marginal difference. It means a high-efficiency system installed carelessly can perform no better than equipment two tiers lower.
The measurable verification items that prove a quality install:
- Signed Manual J report with inputs documented
- Evacuation reading below 500 microns, held for 15 minutes
- Airflow measurement of 350–400 CFM per ton
- Static pressure below 0.5 in. w.c.
- Superheat and subcooling matched to the manufacturer’s chart
- Duct leakage test results (if duct work was modified)
Consider what happens when Manual J is skipped: a contractor matches the old unit’s tonnage, installs a system 0.5 tons oversized, and the unit short-cycles on every mild day. The homeowner notices uneven temperatures and elevated humidity but assumes the equipment is defective. The real cause is sizing, and the fix requires replacing the unit. That scenario plays out regularly, and it is entirely preventable with a proper HVAC load calculation done before equipment is ordered.
ENERGY STAR’s functional testing checklist exists precisely because “it runs” and “it performs to spec” are two different outcomes. Demand documented test results at handoff. A technician who completed the work correctly will have no reason to refuse.
Key Takeaways
A properly installed AC system requires a Manual J calculation, licensed technicians for refrigerant and electrical work, and documented commissioning numbers before you accept the handoff.
| Point | Details |
|---|---|
| Manual J is non-negotiable | Skipping load calculation leads to short-cycling, poor humidity control, and early compressor failure. |
| Refrigerant and electrical are licensed-only | EPA Section 608 and NEC rules prohibit unlicensed refrigerant handling and 240V wiring. |
| Commissioning proves the install | Demand 350–400 CFM per ton, a 16–22°F temperature split, and an evacuation reading below 500 microns in writing. |
| Poor installs cost more to run | ACCA data shows skipping quality installation steps can raise annual energy use by 30% or more. |
| Kcaircontrol handles the full process | Kcaircontrol manages Manual J, permits, commissioning, and the homeowner walkthrough for Kansas City area residents. |
What homeowners should actually expect from a reputable installer
The gap between a technically complete installation and a genuinely good one comes down to documentation and communication. Any crew can connect equipment and leave. A reputable installer shows you the commissioning numbers, walks you through the thermostat settings, hands you the permit receipt, and explains what normal operation looks and sounds like before they pack up.
What you should expect from a qualified installer, and what Kcaircontrol delivers on every job:
- A written Manual J report with the inputs documented, not just a tonnage recommendation
- Permit handling from application through inspection, with the receipt provided to you
- A signed commissioning sheet with actual airflow, temperature split, static pressure, and refrigerant charge measurements
- A nameplate photo and equipment serial number recorded for warranty registration
- A homeowner walkthrough covering filter schedule, shutoff location, and what to watch for in the first 30 days
The contractors who skip those steps are not saving you time. They are shifting the risk onto you. A system that runs but was never properly commissioned can underperform for years before the cause is identified.
Kcaircontrol makes code-compliant AC installation straightforward for Kansas City homeowners
Getting a new AC system installed correctly the first time saves money, protects your warranty, and keeps your home comfortable through Kansas City summers. Kcaircontrol brings over 70 years of field experience to every installation, handling the full scope: Manual J load calculation, permit pulling, licensed refrigerant and electrical work, commissioning with documented test results, and a complete homeowner walkthrough at handoff.

Services available for your next installation or upgrade include new central and split-system installs, duct testing and sealing, indoor air quality add-ons, and flexible financing options so upfront cost does not delay a necessary replacement. If something goes wrong after install, Kcaircontrol’s emergency HVAC troubleshooting service gets you back to comfort fast. Ready to schedule an on-site assessment? Contact Kcaircontrol to book your appointment and get a written quote that includes every line item.
Useful sources for homeowners who want to go deeper
These authoritative resources cover permits, refrigerant rules, commissioning protocols, and sizing standards in detail.
- EPA Section 608 — U.S. Environmental Protection Agency: The governing regulation for refrigerant handling. Read this to understand certification requirements and what unlicensed handling risks.
- ENERGY STAR HVAC Quality Installation: Covers duct assessment, quality installation standards, and what a verified install should include.
- ENERGY STAR HVAC Functional Testing Checklist: The specific commissioning targets (evacuation, airflow, superheat/subcooling) that define a correctly installed system.
- ACCA Quality Standards: Industry standards for Manual J, Manual D (duct design), and quality installation procedures.
- U.S. Department of Energy — Air Conditioning: Plain-language guidance on efficiency, sizing, and what to look for when replacing a system.
- U.S. Department of Energy — Maintaining Your Air Conditioner: Post-install maintenance schedule and filter guidance to protect your investment.
- AHRI — Air-Conditioning, Heating, and Refrigeration Institute: The standards body that certifies equipment ratings; useful for verifying SEER2 and capacity claims on equipment you are considering.
- Carrier AC Installation Guidance: Manufacturer-specific guidance on MCA, breaker sizing, and electrical requirements.
- Trane HVAC Installation Guide for Homeowners: Covers the full professional installation process from site assessment through final walkthrough.
- Kcaircontrol — Energy Efficient HVAC Installation Guide: Local-focused guidance on efficiency standards and measurable installation practices for Kansas City homeowners.