
When your furnace quits on a frigid Kansas City winter night or your AC fails during a summer heatwave, panic sets in fast. Every minute without climate control means discomfort, potential pipe freezing, or heat exhaustion risks for your family. A structured emergency repair workflow cuts downtime and keeps everyone safe. This guide walks you through preparation, safety checks, troubleshooting, professional engagement, and verification so you can restore comfort quickly and confidently.
Your Quick Guide to Emergency HVAC Repair Workflow
- Prerequisites And Preparations For Emergency HVAC Repair
- Immediate Safety Checks And Precautions
- Initial Troubleshooting Steps Homeowners Can Perform
- Engaging Professional Emergency Repair Services In Kansas City
- Common Mistakes And Failures To Avoid During Emergency HVAC Repair
- Expected Costs, Timelines, And Outcomes For Emergency Repairs
- Post-Repair Quality Checks And Outcome Verification
- Restore Your Kansas City Home Comfort With Air Control
- Frequently Asked Questions About Emergency HVAC Repair
Key Takeaways
| Point | Details |
|---|---|
| Preparation speeds resolution | Having tools, manuals, and emergency contacts ready reduces repair time by up to 35%. |
| Safety checks prevent hazards | Shutting off power and recognizing refrigerant leaks protects you from electrical shocks and toxic exposure. |
| Basic troubleshooting clarifies issues | Checking thermostats, filters, and breakers helps technicians diagnose problems 20% faster. |
| Professional engagement ensures quality | Certified Kansas City technicians typically arrive within 2 to 4 hours for emergency calls. |
| Post-repair verification confirms success | Running full system cycles and monitoring for unusual sounds or smells ensures reliable operation. |
Prerequisites and Preparations for Emergency HVAC Repair
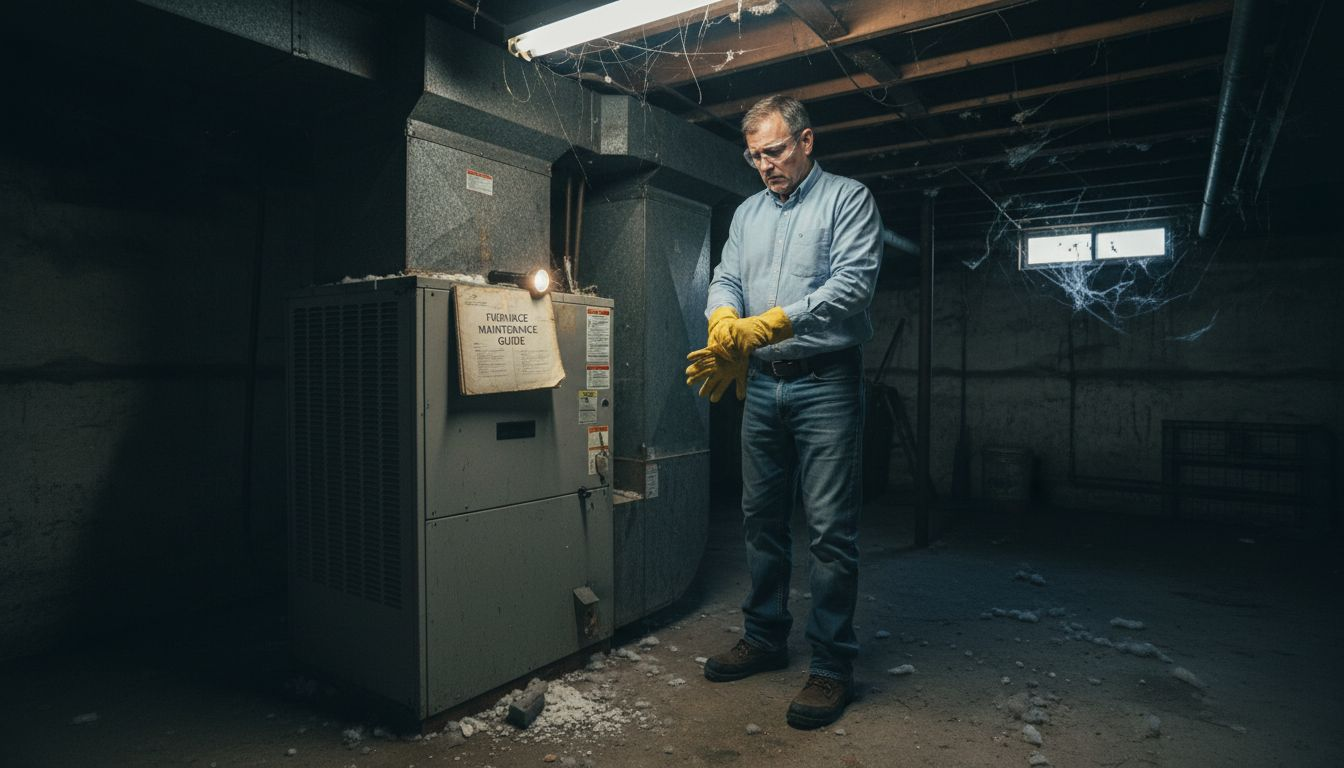
Before any HVAC crisis strikes, smart preparation saves critical minutes. Keep a flashlight, screwdriver set, and your HVAC system manuals in an accessible spot. You need these tools to perform quick inspections and communicate details to technicians.
Knowing how to shut off your HVAC power safely is non-negotiable. Locate your circuit breaker panel and identify the breaker labeled for your heating or cooling system. Most outdoor units also have a dedicated disconnect switch within sight of the unit. Practice flipping these off so you can act without hesitation during an emergency.
Compile contact information for trusted local emergency HVAC troubleshooting services before disaster strikes. Store these numbers in your phone and on a paper list near your thermostat. When your system fails at midnight, you do not want to waste time searching online reviews.
Keeping documentation organized prevents delays. Store warranty papers, service records, and model numbers in a folder or digital file. Technicians can diagnose issues faster when they know your system’s history and specifications.
Pro Tip: Use a label maker to tag your HVAC circuit breaker and outdoor disconnect switch with bold, easy-to-read labels. During a stressful emergency, clear markings eliminate confusion and speed up safety shutdowns.
For additional HVAC preparation tips for homeowners, consider creating a simple checklist that includes filter change dates, thermostat battery replacements, and annual maintenance reminders.
Immediate Safety Checks and Precautions
Safety comes first, always. Before inspecting any HVAC component, turn off power to prevent electrical shock by switching off the circuit breaker and outdoor disconnect. Electricity and moisture near HVAC units create deadly combinations.
Refrigerant leaks pose serious health risks. If you smell a sweet, chemical odor or notice oily residue near your unit, evacuate the area immediately. Never touch refrigerant. It can cause frostbite on contact and respiratory distress when inhaled. Call professionals right away.
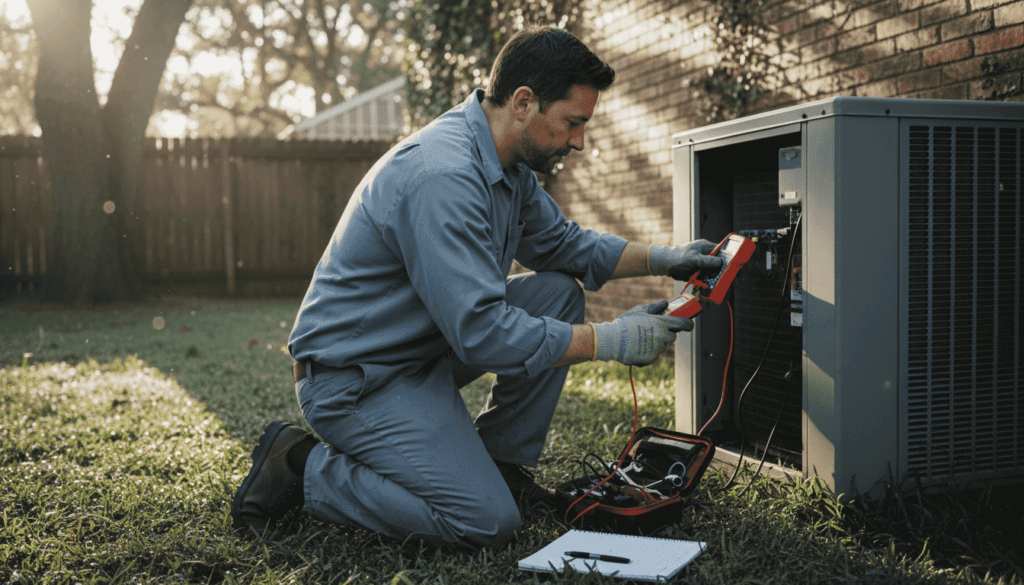
Wear protective gloves and safety glasses when inspecting HVAC parts, even with power off. Sharp edges, hot surfaces, and residual electrical charges can injure you. If you see sparking, hear crackling sounds, or detect burning smells, do not approach the unit.
Recognize when professional help is mandatory. Refrigerant leaks, electrical sparking, gas odors, and flames require immediate expert intervention. Attempting DIY fixes in these scenarios risks injury, property damage, and code violations.
Pro Tip: Install a carbon monoxide detector within 15 feet of your gas furnace. CO buildup from malfunctioning gas HVAC systems kills silently. A detector alerts you before dangerous levels accumulate.
“Electrical shock from HVAC systems causes hundreds of injuries annually. Always shut off power before any inspection, and avoid refrigerant exposure by calling certified technicians for leak repairs.”
For comprehensive HVAC safety checks, establish a routine that includes visual inspections, detector testing, and professional annual maintenance.
Initial Troubleshooting Steps Homeowners Can Perform
Once safety is confirmed, simple troubleshooting helps you understand the problem and communicate clearly with technicians. Start with these steps:
-
Check thermostat settings. Ensure the mode is set correctly (heat in winter, cool in summer) and the temperature setting exceeds current room temperature for heating or falls below it for cooling. Replace thermostat batteries if the display is dim or blank.
-
Inspect air filters. A clogged filter restricts airflow and forces your system to work harder or shut down. Replace disposable filters or clean reusable ones. This simple fix resolves roughly 25% of no-heat or no-cool complaints.
-
Verify power supply. Confirm the circuit breaker is on and the outdoor disconnect switch is engaged. Sometimes breakers trip without obvious cause.
-
Look for visible obstructions. Clear debris, snow, or ice from around outdoor units. Indoor vents and registers should also be unblocked by furniture or curtains.
-
Document symptoms precisely. Note any unusual noises (grinding, squealing, banging), smells (burning, musty, chemical), error codes on digital thermostats, or unresponsive controls. These details help technicians diagnose issues 20% faster.
-
Check condensate drain lines. A clogged drain can trigger safety shutoffs. Look for standing water near your indoor unit.
For a detailed furnace troubleshooting checklist, refer to resources that cover pilot lights, ignition systems, and flame sensor cleaning.
Homeowners can safely rule out common issues like thermostat errors, dirty filters, and tripped breakers. Anything involving refrigerant, electrical components, or gas connections requires professional expertise.
Engaging Professional Emergency Repair Services in Kansas City
After basic troubleshooting, prompt professional engagement is crucial. Call your pre-saved emergency HVAC contacts immediately. In Kansas City, certified technicians typically arrive within 2 to 4 hours for urgent calls.
When you phone, provide detailed symptom descriptions. Mention specific noises, odors, error codes, and what troubleshooting steps you have already taken. This information helps technicians bring the right tools and parts.
Ask about technician certification and licensing. Reputable companies employ NATE-certified professionals who follow strict safety and quality standards. Verify the company is insured to protect yourself from liability.
Use online booking options to reserve service quickly and receive confirmation. Many Kansas City providers offer digital scheduling that reduces phone wait times and guarantees your spot in the queue.
Share recent repair history and system manuals with the technician upon arrival. Knowing past issues and equipment specifications speeds diagnosis. If you had a compressor replaced last year or a blower motor serviced six months ago, that context matters.
Pro Tip: Take photos of error codes, unusual component conditions, or visible damage before the technician arrives. Visual evidence helps explain intermittent problems that may not appear during the service visit.
To find trusted Kansas City HVAC professionals, check online reviews, ask neighbors for referrals, and verify Better Business Bureau ratings. Established local companies with decades of experience typically deliver faster, more reliable emergency service.
For routine maintenance and tune-ups, schedule HVAC services in Kansas City well before peak heating or cooling seasons to avoid emergency situations altogether.
Common Mistakes and Failures to Avoid During Emergency HVAC Repair
Knowing what not to do prevents costly delays and dangerous situations. Avoid these frequent errors:
-
Attempting complex DIY repairs. Opening refrigerant lines, rewiring electrical components, or disassembling blower motors without proper training causes system damage and voids warranties. Professional repairs cost less than fixing DIY mistakes.
-
Skipping power shutoffs. Never inspect HVAC components with power on. Electrical shock injuries spike during emergencies when homeowners rush inspections.
-
Ignoring unusual odors or leaks. Chemical smells, gas odors, and refrigerant leaks demand immediate professional attention. Delaying calls worsens health risks and repair costs.
-
Providing vague problem descriptions. Saying “it does not work” forces technicians to spend extra time diagnosing. Clear communication speeds diagnosis by approximately 20%.
-
Delaying calls during peak seasons. Kansas City winters and summers bring HVAC service backlogs. Early intervention during mild symptoms prevents total system failures during temperature extremes.
“Homeowners who attempt DIY HVAC repairs without training increase total repair costs by an average of 35% and extend downtime by several days due to improper handling and additional damage.”
For guidance on common HVAC repair mistakes, consult resources that explain warranty implications, safety code requirements, and when professional help is legally required.
Another mistake is neglecting to clear the area around your HVAC unit before the technician arrives. Move stored items, pet crates, and seasonal decorations to provide easy access.
Expected Costs, Timelines, and Outcomes for Emergency Repairs
Understanding financial and time commitments helps you plan effectively. Typical Kansas City emergency repair costs range from $150 to $600 depending on issue complexity. Simple fixes like thermostat replacements or filter changes fall at the lower end, while compressor or heat exchanger repairs reach the higher range.
Average technician arrival time is 2 to 4 hours after your emergency contact. Peak season calls during extreme weather may extend this slightly, but reputable companies prioritize urgent no-heat or no-cool situations.
Successful repair means your HVAC system cycles through full heating or cooling operation without unusual noises, odors, or error codes. Temperatures should reach thermostat settings within expected timeframes.
DIY attempts increase repair times and costs by approximately 35%. Homeowners who misdiagnose problems order wrong parts, damage additional components, and ultimately pay for professional fixes on top of wasted DIY expenses.
| Repair Approach | Average Cost | Average Timeline | Success Rate |
|---|---|---|---|
| Professional Emergency Service | $150 to $600 | 2 to 4 hours arrival, 1 to 3 hours repair | 95% first-visit resolution |
| DIY Attempt Followed by Professional | $300 to $900 | 1 to 3 days total | 60% due to initial errors |
Emergency service fees typically include diagnostic charges, labor, and common parts. Complex repairs requiring specialty components may need follow-up visits if parts must be ordered.
For budgeting purposes, consider that regular maintenance reduces emergency repair likelihood by up to 70%. Investing in annual tune-ups costs less than emergency calls.
Post-Repair Quality Checks and Outcome Verification
After technicians complete repairs, verification ensures your system operates reliably. Run your HVAC through full heating or cooling cycles. For furnaces, let the system run for at least 30 minutes. For air conditioners, monitor cooling performance for a full hour.
Listen carefully for unusual noises. Grinding, squealing, or banging sounds indicate incomplete repairs or new developing issues. Similarly, detect any unusual smells like burning, mustiness, or chemicals.
Use your HVAC manuals to confirm system settings match manufacturer recommendations. Check airflow at vents throughout your home. Weak airflow suggests ductwork issues or blower problems.
Post-repair tests should include system cycling through full operation and monitoring for unusual noises or smells to verify repair quality. Report recurring issues to service providers immediately. Reputable companies guarantee their work and return at no charge if problems persist.
Regular checks following repair extend system reliability. Note the date of repair and schedule your next maintenance visit. Keep service receipts for warranty purposes.
For ongoing HVAC post-repair checks, establish a monthly routine that includes filter inspections, thermostat battery checks, and visual outdoor unit inspections.
For detailed post-repair testing protocols, consult industry standards that outline performance benchmarks and quality assurance procedures.
Restore Your Kansas City Home Comfort with Air Control
When HVAC emergencies strike, you need fast, reliable solutions. Air Control offers certified emergency HVAC troubleshooting services backed by over 70 years of Kansas City experience. Our technicians arrive quickly, diagnose accurately, and repair systems right the first time.
Easily book your emergency repair online to restore your home comfort fast. We specialize in expert furnace repair in Kansas City, AC repairs, and indoor air quality solutions. Trusted by thousands of homeowners, we deliver professional service with transparent pricing and guaranteed workmanship. Do not wait until discomfort turns dangerous. Schedule your emergency service now.
Frequently Asked Questions About Emergency HVAC Repair
When should I shut off my HVAC system during an emergency?
Shut off power immediately if you smell gas, see sparking, detect refrigerant leaks, or hear loud banging noises. Any situation involving fire, smoke, or strong chemical odors requires immediate shutdown and professional help. Safety always takes priority over system diagnosis.
How quickly can I expect an emergency HVAC technician to arrive in Kansas City?
Certified Kansas City emergency HVAC technicians typically arrive within 2 to 4 hours of your call. Response times vary slightly during extreme weather when call volumes spike. Booking online or calling established local providers ensures faster service than searching for contractors during the crisis.
What details should I prepare before calling an emergency repair service?
Note your HVAC system’s make, model, and age. Document specific symptoms like error codes, unusual noises, smells, and when the problem started. List any recent repairs or maintenance. Describe troubleshooting steps you have already taken, such as checking the thermostat, replacing filters, or verifying power. These details help technicians diagnose problems 20% faster.
Can I perform any repairs myself safely?
You can safely replace air filters, change thermostat batteries, reset tripped circuit breakers, and clear debris from outdoor units. Never attempt repairs involving refrigerant, electrical wiring, gas lines, or internal components. These tasks require certification, specialized tools, and safety training.
What signs mean I should call for professional emergency repair immediately?
Call professionals immediately if you detect gas odors, refrigerant leaks, electrical sparking, flames, smoke, or carbon monoxide detector alarms. Likewise, complete system failures during extreme temperatures, frozen pipes, or water leaks near your HVAC unit require urgent professional attention.
Pingback: Regular HVAC Servicing Cuts Kansas City Bills 30% in 2026 - KC Air Control - Heating & Cooling