
For Kansas City landlords, keeping HVAC systems running reliably is more than just routine—it directly impacts tenant satisfaction and property value. Knowing how to prepare HVAC equipment for inspection means spotting issues before they lead to breakdowns, improving efficiency, and saving on repair costs. This practical checklist shares steps that help you maintain consistent comfort and optimal system performance, making every inspection smoother and more productive for your residential properties.
Step-by-Step Landlord HVAC Maintenance Checklist
- Step 1: Prepare HVAC Systems for Inspection
- Step 2: Check Essential HVAC Components
- Step 3: Clean and Replace Filters Effectively
- Step 4: Test System Performance and Safety
- Step 5: Verify Tenant Comfort and Report Actions
Quick Summary
| Important Insight | Clear Explanation |
|---|---|
| 1. Prepare HVAC Before Inspection | Spend 30 minutes cleaning and checking your HVAC system to avoid surprises during professional inspections. |
| 2. Inspect Essential Components | Allocate 20 minutes to check fans, motors, coils, and electrical connections to catch issues early. |
| 3. Replace Filters Regularly | Change or clean HVAC filters every month or as recommended to maintain efficiency and air quality. |
| 4. Test System Performance | Dedicate 15 minutes to monitor temperature outputs and airflow, ensuring the system operates safely and effectively. |
| 5. Document Tenant Feedback | Gather precise tenant comments on comfort and concerns to support maintenance actions and improve service. |
Step 1: Prepare HVAC Systems for Inspection
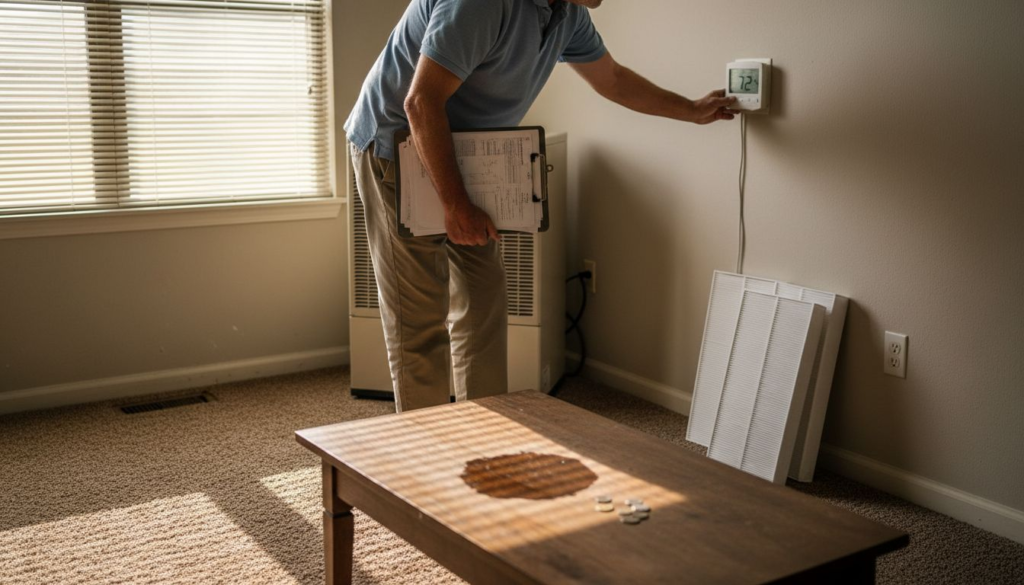
Start by understanding what preparing your HVAC system actually means. You’re checking that everything operates reliably before a professional inspection and ensuring your tenants enjoy consistent comfort. This step takes about 30 minutes and requires no special tools.
First, locate your system’s main components. You’ll need to find the filter housing, outdoor unit, indoor coil area, and thermostat. Understanding airflow paths and filter locations helps you evaluate the overall system health. Walk through the space where your tenants spend the most time and note the condition around vents and returns.
Next, check the visible components for obvious issues:
- Visual inspection of the outdoor unit: Look for debris, leaves, or obstructions around the condenser coils.
- Filter assessment: Note whether the current filter appears dirty or clogged. A restrictive filter reduces airflow significantly.
- Thermostat function: Verify the thermostat displays correctly and responds to temperature adjustments.
- Ductwork condition: Look for disconnected sections, visible holes, or crushed areas in accessible ductwork.
Now gather documentation your technician will want. Collect any previous service records, warranty information, and notes about recent system behavior. If tenants reported hot spots, cold spots, or unusual noises, write these down.
Test basic operation by setting the thermostat to heat, then cool, and listening for the system to respond. The outdoor unit should engage within a few minutes of adjusting the temperature. This confirms the basics work before inspection arrives.
Landlords who prepare their systems beforehand report faster inspection appointments and fewer surprises about system condition.
Consider reviewing seasonal HVAC maintenance steps to understand what your technician will evaluate during the full inspection.
Pro tip:Take photos of your system’s current state before the inspector arrives, including the filter condition, serial numbers on equipment, and any visible damage or concerns. This gives you a reference point for discussing findings and tracks changes over time.
Step 2: Check Essential HVAC Components
This step focuses on the critical parts that keep your system running smoothly. You’ll inspect fans, motors, coils, and electrical connections to catch problems before they become expensive repairs. Expect to spend about 20 minutes on this inspection.
Start by examining the indoor coil and filter assembly. The indoor coil sits near your furnace or air handler and handles heat exchange. Look for visible dirt, ice buildup, or corrosion on the coil surfaces. A clogged coil reduces efficiency dramatically and forces your system to work harder. Check that routine inspections catch common mechanical wear early, preventing system failures.
Next, move to the outdoor condenser unit. This is where heat is expelled during cooling. Check for these key issues:
- Fan operation: Listen for abnormal grinding, squealing, or rattling sounds when the system runs.
- Motor condition: Look for rust, leaking oil, or visible corrosion on the motor housing.
- Refrigerant lines: Inspect copper tubing for kinks, cracks, or loose connections.
- Electrical connections: Verify all wires are intact and terminals show no burn marks or corrosion.
Inspect your furnace or air handler next. The blower fan should spin freely without obstruction. Check that all ductwork connections are secure and not leaking. Look at the heat exchanger for rust or cracks, which indicate serious problems requiring professional repair.

Verify all control systems and dampers function properly. Set your thermostat to different modes and listen for relays clicking and fans engaging. Dampers should move freely in accessible ductwork areas.
Here’s a summary of key HVAC components and the issues they influence:
| Component | Typical Problem | Impact on System |
|---|---|---|
| Air Filter | Clogging, dirt buildup | Low airflow, higher bills |
| Outdoor Unit | Debris or coil blockage | Poor cooling efficiency |
| Thermostat | Display or control failure | Inconsistent temperature |
| Ductwork | Leaks, disconnections | Uneven room temperatures |
| Blower Motor | Noise, jamming | Reduced air circulation |
| Refrigerant Lines | Leaks or kinks | Loss of cooling/heating |
Systems with properly maintained components operate 15% more efficiently and experience fewer unexpected breakdowns.
When issues arise during these checks, understanding furnace troubleshooting steps helps you communicate problems clearly to your technician.
Pro tip:Note the exact location and appearance of any unusual deposits, leaks, or corrosion using your phone camera, then email photos to your HVAC technician before the inspection. This saves time and helps them prepare the right parts and tools.
Step 3: Clean and Replace Filters Effectively
Clean filters are the foundation of efficient HVAC operation. Dirty filters restrict airflow, waste energy, and degrade indoor air quality for your tenants. This task takes just 10 minutes and directly impacts system reliability.
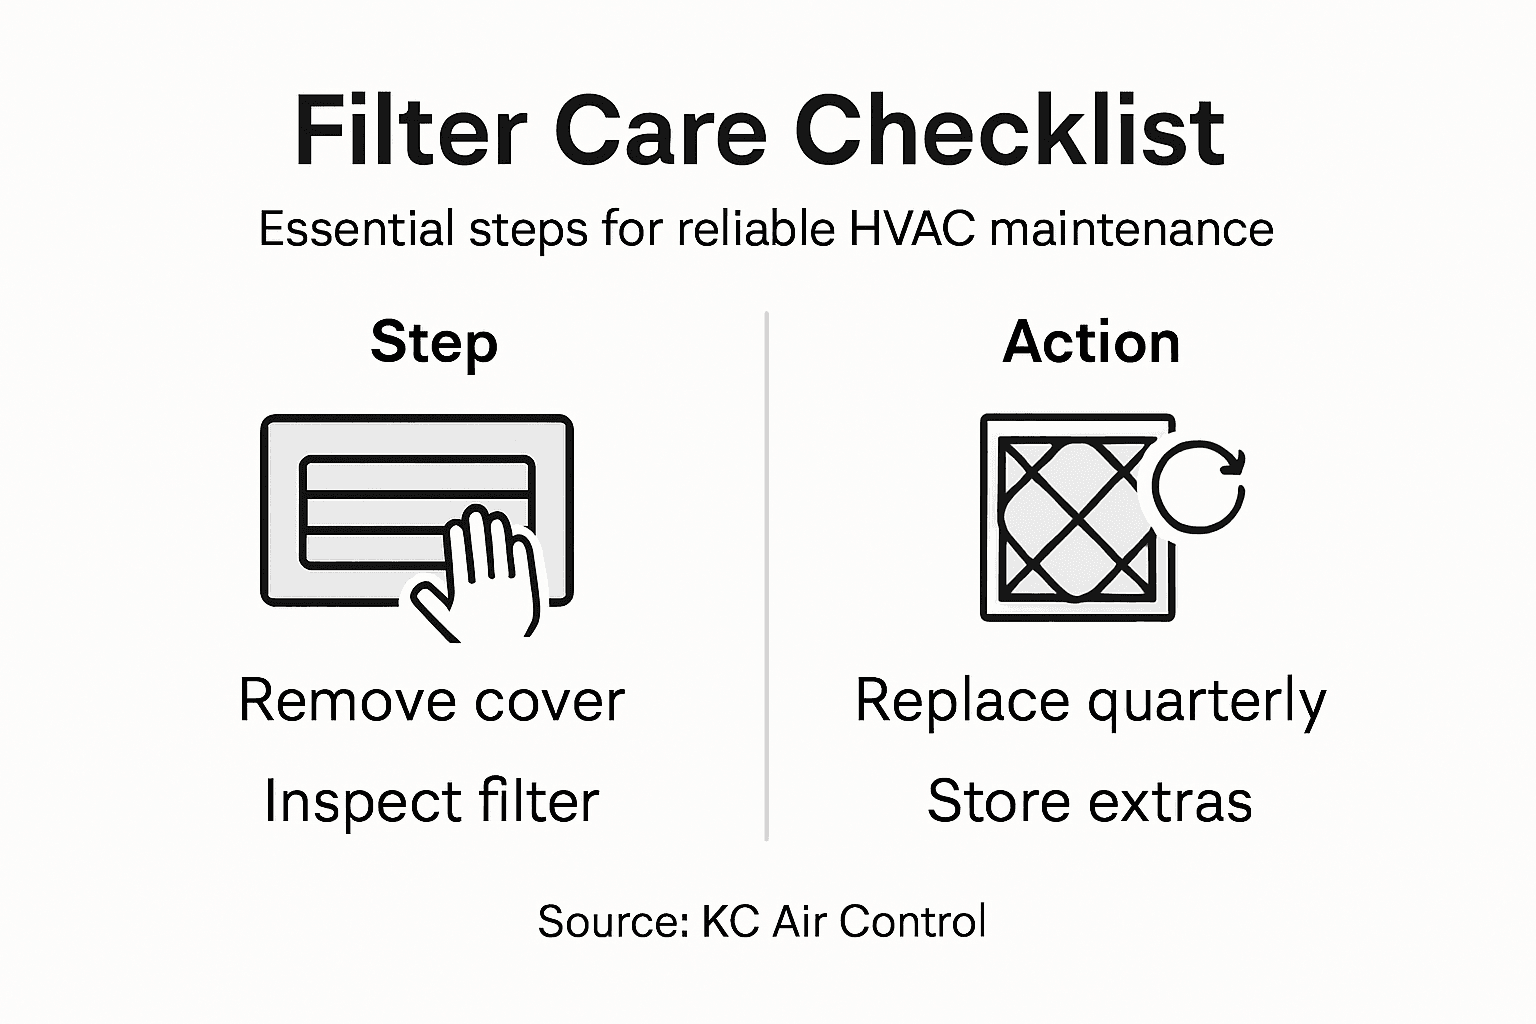
Locate your filter housing first. Most residential systems have filters in the furnace cabinet or a return air duct area. Check the current filter’s condition by holding it up to light. If you cannot see light through it, replacement is overdue. Inspecting and replacing air filters monthly maintains system efficiency and prevents equipment damage.
Note the filter size before purchasing replacements. Look for dimensions printed on the frame, typically something like 16x25x1 or 20x20x4. Write down the MERV rating too—this indicates filtration efficiency. Most residential systems work well with MERV 8 to MERV 11 filters.
When replacing, follow these steps:
- Turn off your HVAC system completely before opening the housing.
- Remove the old filter carefully, noting which direction the airflow arrow points.
- Vacuum out any dust or debris from the filter housing.
- Insert the new filter with the arrow facing toward the furnace or air handler.
- Confirm the filter fits snugly with no gaps around edges.
- Close the housing and restart your system.
For reusable filters, vacuum them gently or rinse with water following manufacturer instructions. Allow them to dry completely before reinstalling. Never force a damp filter back into place.
Record the replacement date on your filter or take a photo of the new filter with today’s date. This helps you track when the next replacement is due.
Clogged filters reduce efficiency by up to 20% and force your system to work harder, increasing wear on components.
Most landlords find it easiest to replace filters quarterly or according to manufacturer recommendations for their specific filter type.
Compare filter types and maintenance frequency for optimal performance:
| Filter Type | Typical Change Interval | Best Use Case |
|---|---|---|
| Pleated (MERV 8-11) | Every 3 months | Standard residential units |
| HEPA | Every 6-12 months | Allergy-sensitive tenants |
| Electrostatic | Monthly cleaning | Reusable, cost-conscious |
| Fiberglass | Every 1 month | Low-cost, short-term use |
Pro tip:Buy filters in bulk online during off-season sales and store them flat in a dry location. Having extras on hand means you can replace filters promptly when tenants report reduced airflow, preventing emergency service calls.
Step 4: Test System Performance and Safety
Testing your HVAC system reveals whether it operates safely and efficiently. You’ll check temperature output, airflow, and safety controls to ensure everything works as intended. This step takes about 15 minutes and requires only basic tools.
Start by setting your thermostat to heating mode during cold months. Listen for the furnace to ignite within 30 seconds of the system starting. Feel the heat output at nearby vents after another minute or two. The air should feel warm but not uncomfortably hot. If ignition takes longer than a minute or the furnace fails to start, note this for your technician.
Switch to cooling mode and wait for the air conditioner to engage. This typically takes 2 to 3 minutes as the outdoor unit powers up. After the system runs for several minutes, check the temperature at multiple vents throughout the property. Cool air should flow consistently from all registers. Weak or warm airflow indicates efficiency problems.
Test these safety features:
- Thermostat responsiveness: Adjust the temperature setting by 5 degrees and verify the system responds within a few minutes.
- Blower operation: Confirm the indoor fan runs smoothly without unusual noises like grinding or squealing.
- Auto shutoff: Set the system to cool and then manually raise the thermostat above the current temperature. The system should stop running promptly.
- Gas valve safety: For gas furnaces, smell around the unit for any gas odors. Report any smell immediately to a professional.
Measuring airflow and temperature parameters through standardized testing helps verify that your system meets design specifications and operates safely.
Record the temperatures you measured at different locations. Note any unusual sounds, odors, or performance issues. This documentation helps your technician understand baseline system behavior.
Systems that maintain consistent temperature throughout the property indicate balanced airflow and efficient operation.
Pro tip:Use a basic digital thermometer to measure air temperature at supply vents in different rooms. Write down these readings before your professional inspection. Temperature variations larger than 3 degrees between rooms often signal ductwork problems or balancing issues.
Step 5: Verify Tenant Comfort and Report Actions
Tenant comfort directly reflects your HVAC system’s health. This step involves gathering feedback from your tenants and documenting any issues for your technician. You’ll create a clear record that protects both you and your tenants.
Reach out to your tenants with a simple question list. Ask whether they experience consistent temperatures throughout their unit, if they hear unusual noises from the system, or if they’ve noticed reduced airflow. Listen for complaints about hot spots, cold spots, or areas that never seem to reach the desired temperature. These observations reveal real-world system performance that lab tests might miss.
Document tenant feedback carefully. Record their comments word-for-word rather than paraphrasing. Include the date, the tenant’s unit number, and specific details like which rooms feel uncomfortable. This documentation becomes valuable when discussing repairs with your technician.
Create a simple inspection report that includes:
- Date and time of your inspection
- Filter condition and replacement status
- Temperature readings from different areas
- System sounds you heard during operation
- Tenant feedback about comfort levels
- Any visible issues you observed
- Safety concerns if any were noted
Maintaining HVAC systems to ensure habitable living conditions protects your tenants’ rights while supporting your maintenance obligations.
Share your findings with the technician before they arrive for the full inspection. Email your photos, temperature readings, and tenant comments so they arrive prepared. This collaboration speeds up the inspection process and reduces service time.
Tenants who feel heard and see timely maintenance action are more likely to report problems early rather than waiting until systems fail completely.
Create a follow-up communication plan for after professional service is completed. Let tenants know what was done and invite them to report any remaining comfort issues within a week.
Pro tip:Send tenants a simple text or email asking about their comfort one week before your formal inspection. This gives them time to notice issues they might have grown accustomed to, resulting in more accurate feedback about system performance.
Keep Your Rental Properties Comfortable and Efficient With Expert HVAC Maintenance
Managing HVAC systems can be challenging for landlords who want to avoid surprises and ensure tenant comfort year-round. This article highlights critical pain points like clogged filters, inefficient components, uneven temperatures, and safety concerns that often lead to costly repairs or unhappy tenants. By following a detailed maintenance checklist, landlords can detect problems early, improve system reliability, and reduce energy costs.
If you want professional support to handle these challenges with ease, explore our Importance Of Maintenance – Air Control resources to learn why scheduled upkeep prevents unexpected breakdowns. At KC Air Control, we combine over 70 years of experience with quality workmanship to provide trusted AC repair, furnace servicing, duct cleaning, and indoor air quality solutions you can count on.
Don’t wait for tenant discomfort or costly system failures to act. Schedule your HVAC maintenance today through KC Air Control and keep your systems running reliably. Partner with a local expert who prioritizes your peace of mind and tenant satisfaction.
Frequently Asked Questions
How can I prepare my HVAC system for inspection?
Start by checking the main components, including the filter, outdoor unit, indoor coil, and thermostat. Walk through your tenants’ spaces to note any issues around vents and returns. Spend about 30 minutes on this step for a reliable start.
What essential components should I check during HVAC maintenance?
Inspect critical parts like fans, motors, coils, and electrical connections to catch problems early. Spend approximately 20 minutes examining these areas to ensure everything is functioning smoothly and efficiently.
How often should I clean or replace HVAC filters?
You should replace air filters every 1 to 3 months, depending on the type of filter used. Verify the filter size and MERV rating, and record replacement dates to maintain optimal airflow and indoor air quality.
What should I test to ensure my HVAC system is performing safely?
Test the temperature output, airflow, and safety features of your HVAC system. Set your thermostat to heating and cooling modes and listen for the system’s response, checking for warm and cool air at vents within a few minutes.
How can I gather tenant feedback regarding HVAC comfort?
Reach out to your tenants by asking specific questions about temperature consistency, unusual noises, and airflow issues. Document their comments clearly to share with your technician during inspections, enhancing communication about any discrepancies or concerns.
Why is it important to document my HVAC system’s maintenance actions?
Documenting maintenance actions allows you to track system performance and address any recurring issues effectively. Create a simple report including filter conditions, temperature readings, and tenant feedback to provide a comprehensive overview for your technician.
Recommended
- Why Schedule HVAC Maintenance: Protect Your Comfort – Air Control
- Seasonal HVAC Maintenance Steps for Home Energy Savings – Air Control
- How to Install HVAC System for Home Comfort – Air Control
- 6 Essential Steps for a Furnace Troubleshooting Checklist – Air Control
- 7-Step Field Service Management Checklist for HVAC Efficiency
Brazzino is alright! Tried it out on a whim, and I was pleasantly surprised! They have a good selection of games and everything runs smoothly. Give it a shot! Brazzino
Pingback: Emergency HVAC Repair Workflow KC: 35% Faster Fixes - KC Air Control - Heating & Cooling