
TL;DR:
- Regularly cleaning air ducts improves indoor air quality and system performance, but only addresses a small part of the system.
- Professional cleaning uses advanced equipment, like truck-mounted HEPA vacuums, for comprehensive source removal; DIY methods can only reach 5-10 percent of ductwork.
Air duct cleaning is the process of removing dust, debris, and contaminants from the ductwork of your home’s HVAC system to improve indoor air quality and system performance. The National Air Duct Cleaners Association (NADCA) sets the industry standard for this work, and experts recommend cleaning every 2 to 5 years, with more frequent service after renovations, pest problems, or for allergy sufferers. Knowing how to clean air ducts yourself saves money on routine maintenance, but understanding where DIY ends and professional service begins protects your home and your health. Kcaircontrol has served Kansas City homeowners for over 70 years with exactly that balance in mind.
What tools do you need before cleaning air ducts?
The right tools make the difference between a safe, effective cleaning and one that makes your air quality worse. A standard household vacuum is not enough. Vacuums without HEPA filters blow fine dust particles back into your living space, which defeats the purpose entirely.
Essential tools for DIY duct cleaning:
- HEPA-filtered shop vacuum (at least 5 gallons)
- Flexible duct cleaning brushes (soft bristle only)
- Microfiber cloths for wiping vent covers and duct boots
- Flathead and Phillips screwdrivers for removing vent covers
- Flashlight or headlamp to see inside duct openings
- N95 respirator mask, safety goggles, and disposable gloves
| Tool | Purpose | Why it matters |
|---|---|---|
| HEPA shop vacuum | Suction dust from ducts | Traps fine particles instead of recirculating them |
| Soft duct brush | Loosen caked-on debris | Stiff brushes can tear flexible duct liners |
| Microfiber cloth | Wipe vent covers and boots | Captures dust without spreading it |
| Flashlight | Inspect duct interiors | Reveals buildup you cannot see otherwise |
| N95 mask | Protect your lungs | Blocks fine dust and mold spores during cleaning |
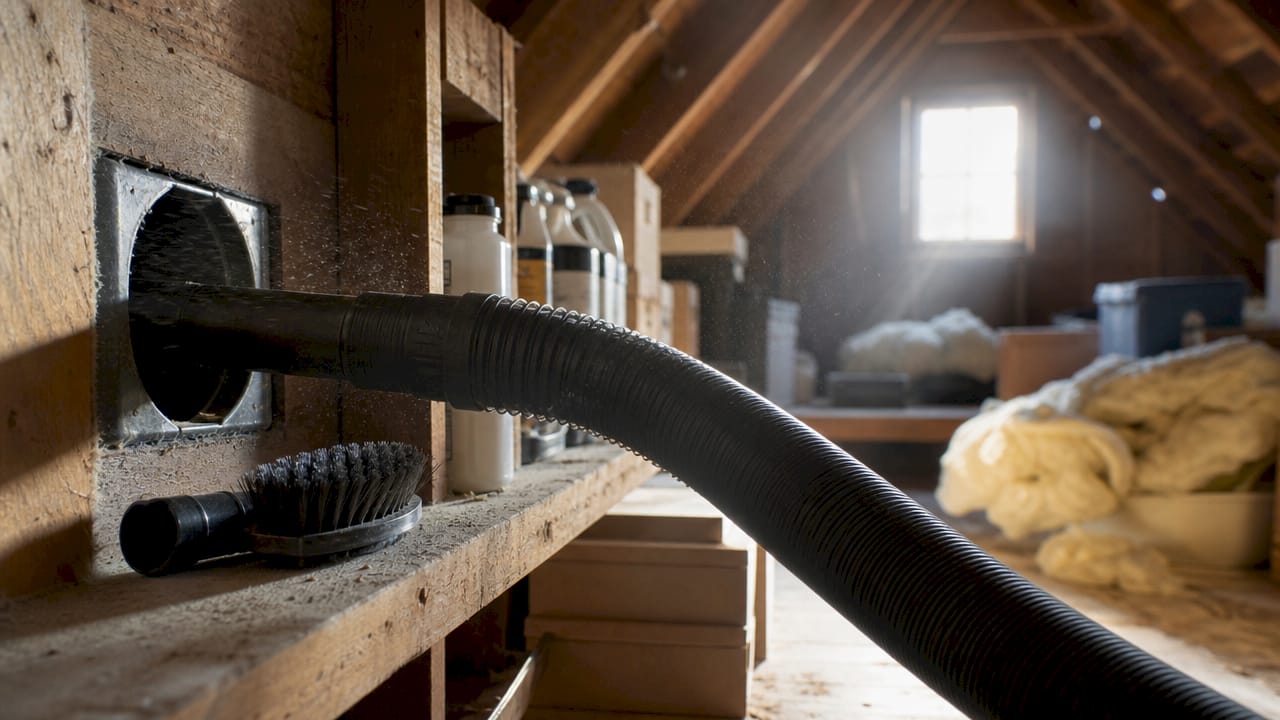
Professional equipment goes much further. Certified technicians use truck-mounted HEPA vacuums that generate 3,000+ CFM of negative pressure to pull debris out of the entire system at once. That level of suction is not available in any consumer product.
Pro Tip: Buy or rent a HEPA shop vacuum rated for fine dust. A standard wet/dry shop vac without HEPA filtration will push allergens back into the air you breathe.
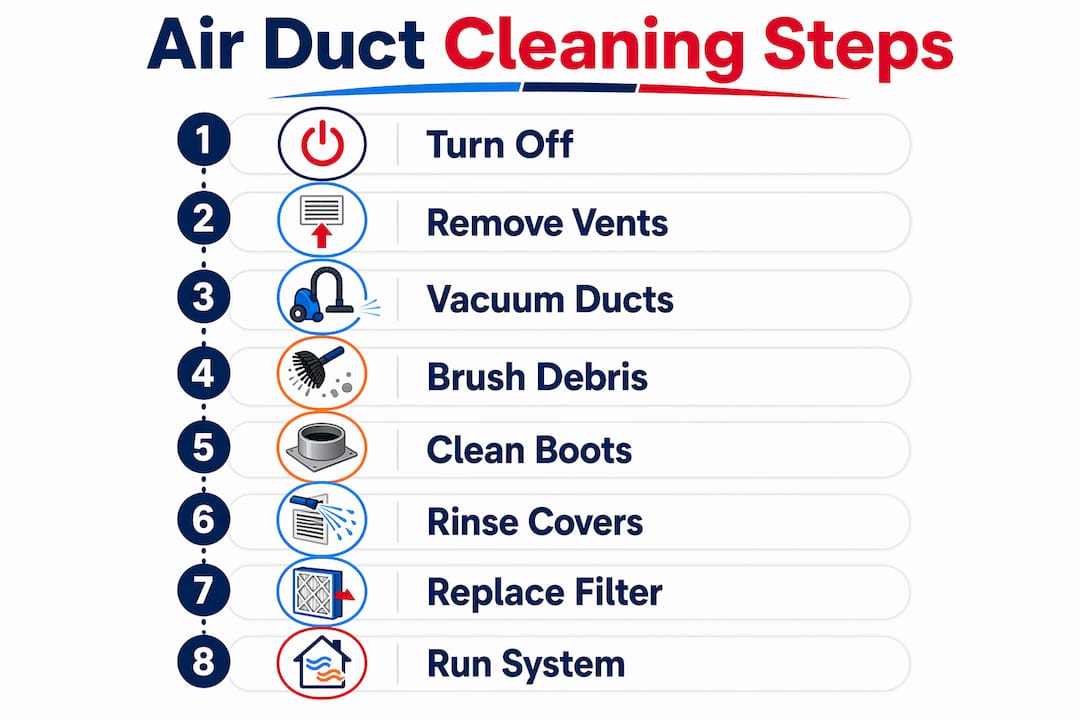
How to clean air ducts yourself: step-by-step
This air duct cleaning guide covers the full process from preparation to finishing. Follow each step in order. Skipping steps, especially the first one, causes more harm than good.
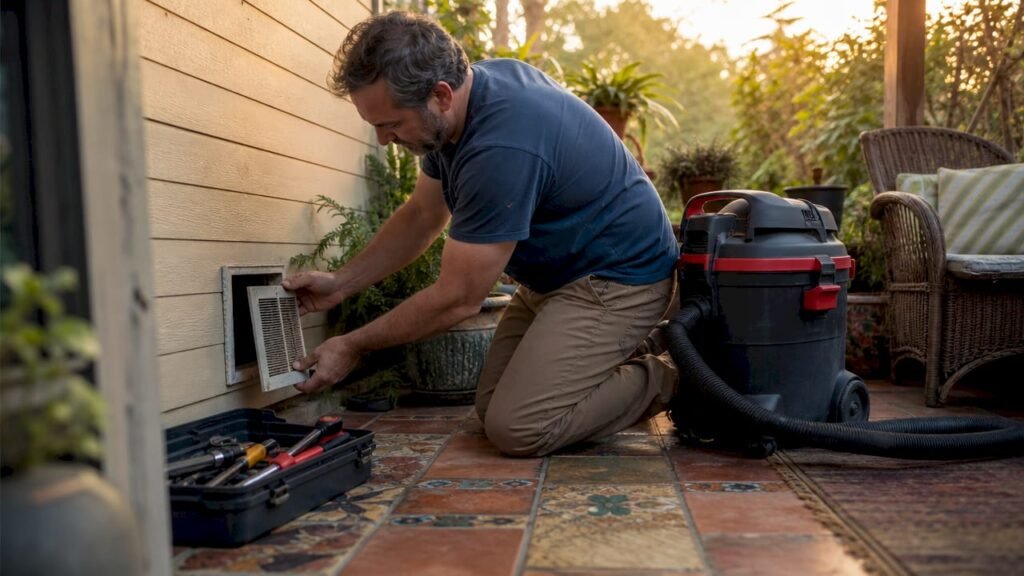
Step 1: Turn off your HVAC system
Power off the HVAC system completely before touching any vent cover. This stops the fan from blowing dust through the house while you work. Go to your thermostat and set it to “off,” not just “fan auto.”
Step 2: Remove and soak vent covers
Unscrew every supply and return vent cover in your home. Place them in a sink or tub filled with warm, soapy water. Let them soak for 10–15 minutes while you work on the ducts. This loosens years of grease and dust without scrubbing.
Step 3: Vacuum the accessible duct runs
Insert the HEPA shop vacuum hose as far as it reaches into each duct opening. Move it slowly from side to side. Do not rush. Dust that has settled for months needs time to be fully captured. Work through every supply duct and every return air duct in the house.
Step 4: Brush and loosen stubborn debris
Use a soft-bristle duct brush to agitate dust deeper in the duct run. Push the brush in gently, rotate it, and pull it back slowly. Follow immediately with the vacuum hose to capture what you loosened. Never use a stiff wire brush. Stiff brushes damage flexible duct liners, and repairs are expensive.
Step 5: Clean the duct boots
The duct boot is the metal housing behind the vent cover where the duct connects to the register opening. Duct boots collect heavy dust deposits that most homeowners miss completely. Wipe the inside of each boot with a damp microfiber cloth. Use your flashlight to check for buildup before reinstalling the cover.
Step 6: Rinse and dry vent covers, then reinstall
Pull the vent covers from the soak, rinse them under clean water, and dry them fully with a towel. Reinstall each cover with its screws. Loose or missing covers allow unfiltered air to enter the system.
Step 7: Replace the air filter and run the system
Install a fresh air filter before turning the system back on. Then run your HVAC system for 20–30 minutes. Running the system after cleaning pulls any remaining loose particles into the new filter, giving you noticeably cleaner air within the hour.
Pro Tip: Write the date on your new air filter with a marker. This simple habit tells you exactly when to replace it next, which is typically every 60–90 days depending on your home.
Cleaning your air vents and ducts on a regular schedule keeps your HVAC system running efficiently and reduces the load on your filter between professional visits.
When should you hire a professional instead?
DIY cleaning addresses only 5–10% of a home’s duct system. You can clean what you can reach, but the bulk of your ductwork runs through walls, ceilings, and crawl spaces that no homeowner can access safely. Professional cleaning uses source removal, which combines mechanical agitation with negative pressure containment to clean the entire system at once.
Signs you need professional duct cleaning:
- You recently completed a renovation or remodel
- You see visible mold growth inside duct openings
- You have a pest or rodent infestation in the ductwork
- A household member has severe allergies or asthma that is getting worse
- You notice a persistent musty or burning smell from the vents
- You have never had the ducts professionally cleaned in over five years
“Hiring NADCA-certified and insured professionals is critical to avoid damage and get effective cleaning results.” Verify certification and insurance before any technician enters your home.
Professional cleaning typically takes 2 to 4 hours and costs $199 to $339 for up to 10 vents. That price reflects specialized equipment, trained technicians, and a whole-system result that DIY simply cannot match. Professionals also seal registers to create negative pressure containment zones, which prevents dust from entering your living areas during the cleaning process.
If you notice signs of HVAC trouble alongside dirty ducts, address both at the same time. Dirty ducts and a struggling system often share the same root cause.
Common mistakes to avoid when cleaning ducts yourself
Most DIY duct cleaning errors fall into a short list. Knowing them in advance saves you from costly repairs and wasted effort.
- Using a stiff brush: Wire or stiff-bristle brushes tear the inner lining of flexible ducts. Use only soft-bristle brushes designed for ductwork.
- Skipping the HEPA filter on your vacuum: A standard shop vac exhausts fine dust back into the room. Always use a HEPA-rated vacuum for this job.
- Leaving the HVAC system running: Cleaning with the fan on spreads loosened dust through every room. Always power off completely first.
- Ignoring the duct boot: The boot behind each vent cover is the dirtiest part of the register assembly. Skipping it leaves the biggest source of debris in place.
- Overreaching into the duct: Forcing your arm or a tool too far into a duct can dislodge connections or puncture liner material. Work only within comfortable reach.
- Forgetting to replace the air filter: Cleaning the ducts without installing a fresh filter means the loosened dust has nowhere to go. Always finish with a new filter.
Pro Tip: Before you start, take a photo inside each duct opening with your phone’s flashlight. Compare photos after cleaning. Visual proof shows you what you actually removed and whether a section needs more attention.
Incorrect tool use is one of the leading causes of HVAC system damage in homes that attempt DIY duct work without proper preparation.
Key takeaways
Effective air duct cleaning requires the right tools, a complete step-by-step process, and a clear understanding of what DIY can and cannot achieve compared to professional source removal.
| Point | Details |
|---|---|
| Use HEPA-filtered equipment | Standard vacuums recirculate fine dust; always use a HEPA shop vacuum for duct cleaning. |
| Follow the full seven-step process | Skipping steps like cleaning duct boots or replacing the filter reduces results significantly. |
| DIY covers only a fraction of the system | Homeowners can reach 5–10% of ductwork; full cleaning requires professional equipment. |
| Clean every 2–5 years | Schedule professional cleaning sooner after renovations, pest issues, or for allergy sufferers. |
| Verify NADCA certification | Always confirm certification and insurance before hiring any duct cleaning professional. |
What I’ve learned after years of watching homeowners clean their own ducts
Most homeowners underestimate how little of their duct system they can actually reach. I have seen well-intentioned DIY jobs where the homeowner spent two hours cleaning and felt great about it, only to find the same dust and debris problems six months later. The accessible registers look clean. The rest of the system does not change.
That said, DIY cleaning is genuinely useful for routine maintenance between professional visits. Wiping vent covers, vacuuming the first foot or two of each duct run, and replacing filters on schedule keeps the system healthier and extends the time between full professional cleanings. Think of it as brushing your teeth between dental visits. It matters. It just does not replace the deeper work.
The mistake I see most often is skipping the air filter replacement at the end. Homeowners do all the right steps, loosen a significant amount of debris, and then put the old filter back in. That filter is already clogged. It cannot capture what you just disturbed. A fresh filter at the end of every cleaning session is non-negotiable.
My honest recommendation: do the DIY work twice a year for surface maintenance, and schedule a professional cleaning every 3 years at minimum. If you have pets, allergies, or older ductwork, move that to every 2 years. The cost of professional cleaning is modest compared to the cost of HVAC repairs caused by years of accumulated debris restricting airflow.
— AB
Kcaircontrol’s professional duct cleaning for Kansas City homeowners
When DIY maintenance is not enough, Kcaircontrol is ready to help. Our certified technicians follow NADCA standards for every residential duct cleaning job in the Kansas City area, using professional-grade equipment that reaches the full duct system, not just the registers you can see.
We have backed Kansas City homeowners with reliable HVAC service for over 70 years. Whether you need a full professional duct cleaning or a complete HVAC inspection, our team shows up prepared and gets the job done right. If your system needs more than a cleaning, our emergency HVAC troubleshooting service restores comfort fast. Schedule your appointment online or call us today.
FAQ
How often should you clean air ducts?
Experts recommend professional air duct cleaning every 2 to 5 years. Clean sooner if you have completed a renovation, discovered pests, or have household members with allergies or asthma.
Can you clean air ducts yourself?
Yes, but DIY methods only reach 5–10% of the duct system. You can clean accessible registers, vent covers, and duct boots, but full source removal requires professional equipment.
What vacuum should you use for duct cleaning?
Always use a HEPA-filtered shop vacuum. Standard vacuums without HEPA filtration blow fine dust back into your home, which worsens indoor air quality instead of improving it.
What are the signs you need professional duct cleaning?
Visible mold, pest activity, persistent musty odors from vents, worsening allergy symptoms, or no professional cleaning in over five years all indicate it is time to call a certified technician.
How long does professional duct cleaning take?
A professional duct cleaning job typically takes 2 to 4 hours and costs $199 to $339 for up to 10 vents, depending on the size and condition of the system.