

A portable humidifier can be running safely in under 30 minutes. A whole-house unit is a different story — it involves duct cuts, plumbing taps, and low-voltage wiring that most homeowners are better off leaving to a licensed HVAC technician.
Here’s the short version of what you need to do right now:
For a portable unit:
- Place on a firm, level, water-resistant surface at least 2 feet off the floor
- Fill with distilled water (not tap water)
- Power on and set your humidistat to a relative humidity between 40% and 60%, the range recommended for comfort and health
- Check the reservoir daily and rinse it weekly
For a whole-house unit:
- Turn off power and water to your furnace before anything else
- Take photos of your furnace, ductwork, and pipe type
- Confirm you have a 120V outlet nearby and clearance on the supply or return plenum
- Call a licensed HVAC technician unless you have sheet metal, plumbing, and low-voltage wiring experience
Pro Tip: Never place a portable humidifier on carpet or directly on a wood floor. Moisture seeps down, not just out, and you’ll have a mold problem before you notice it.
Table of Contents
- How to set up a portable humidifier step by step
- Should you hire a pro for a whole-house humidifier?
- How to clean and maintain your humidifier
- Where to place your humidifier and what humidity level to target
- How to troubleshoot common humidifier problems
- How long does setup take, and what does it cost?
- Key Takeaways
- What HVAC technicians actually see go wrong
- Kcaircontrol handles the hard part of humidifier installation
- Useful sources and manufacturer guidance
How to set up a portable humidifier step by step
Portable humidifiers are genuinely beginner-friendly. The whole humidifier installation process takes 10–30 minutes, and the steps below apply to most ultrasonic and evaporative models.
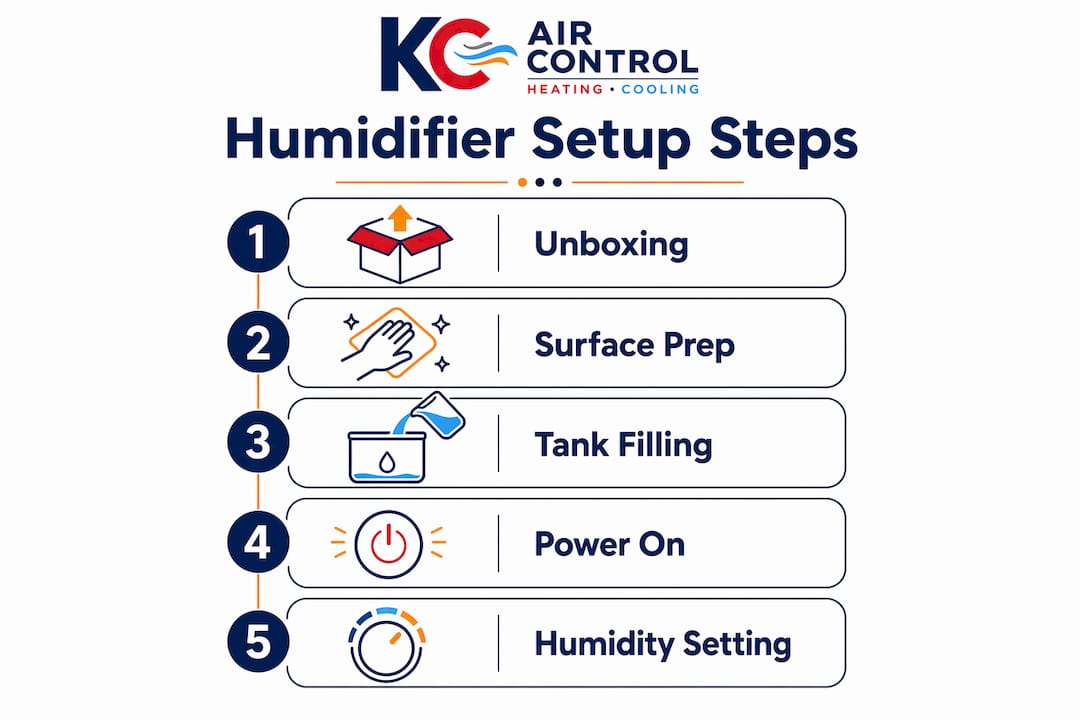
Unboxing and surface prep
Set the unit on a firm, level, water-resistant surface. Manufacturer guidance for portable models consistently calls for at least 12 inches of clearance from walls and furniture. Two feet off the floor is the sweet spot for even mist distribution — high enough to disperse before it settles and low enough to stay stable.
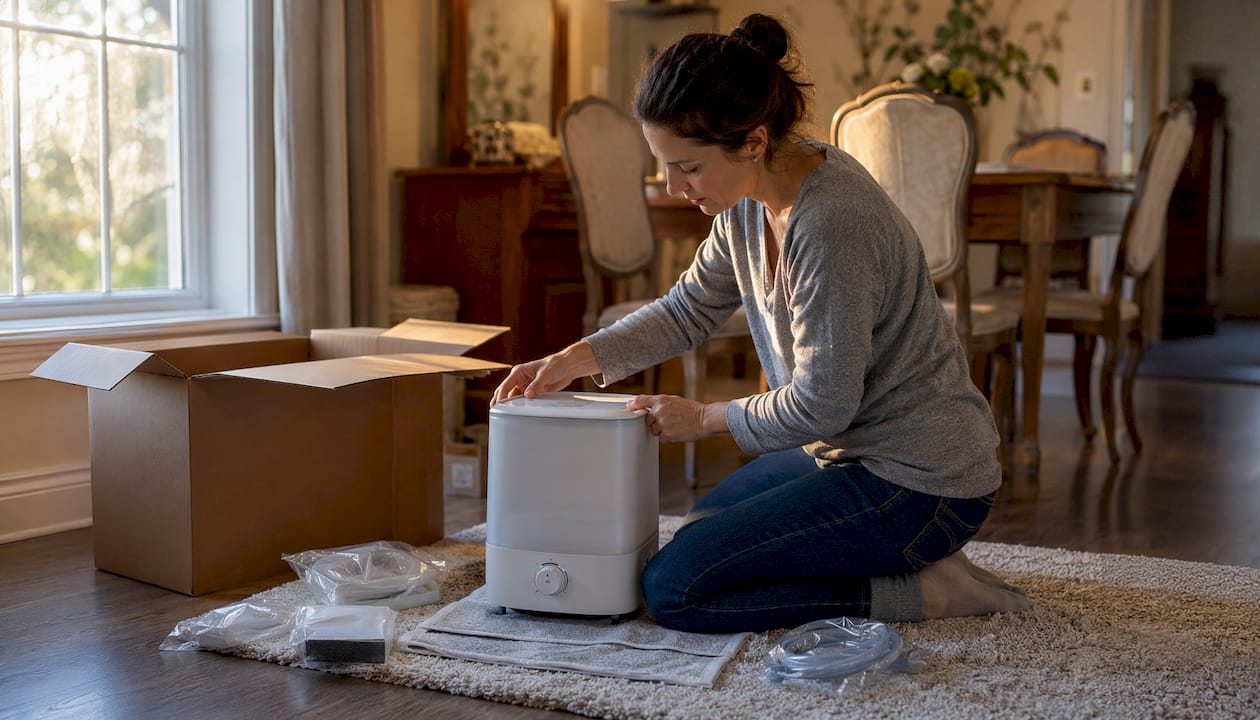
Keep the unit away from wood furniture, electronics, and carpets. Mist that lands on a surface before it evaporates causes water damage over time.
Filling the tank
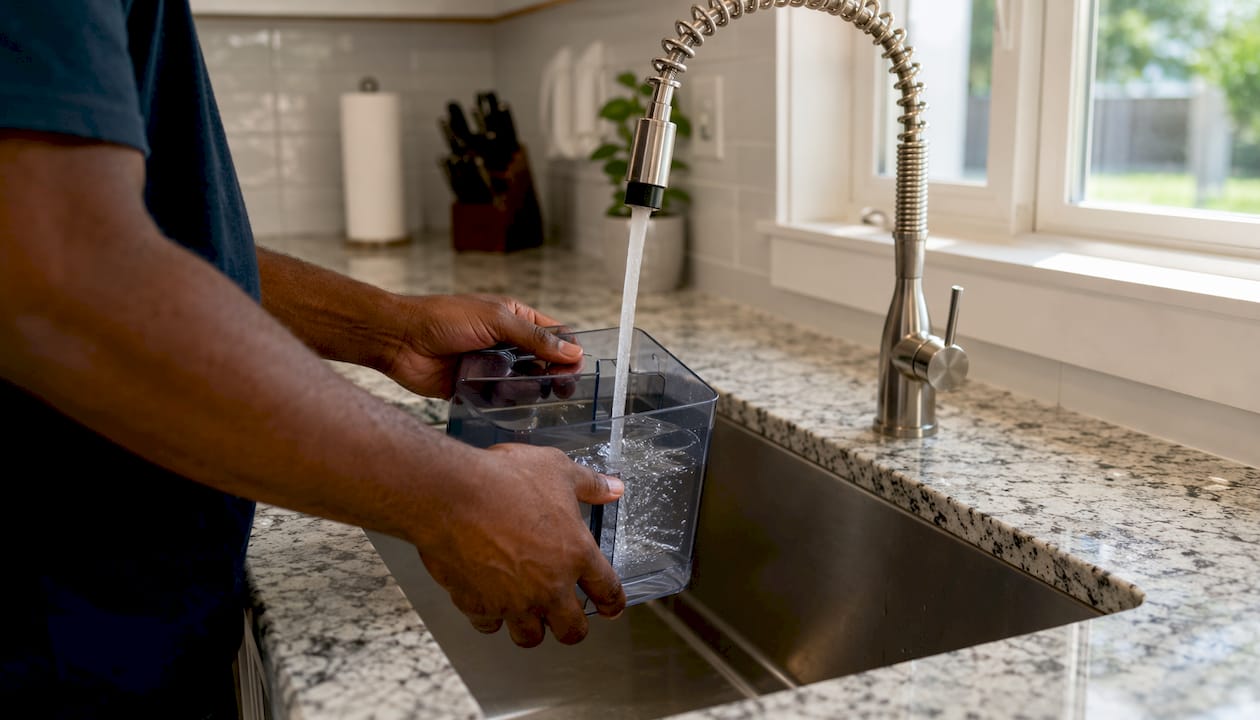
Remove the tank, carry it to a sink, and fill it with distilled water. Tap water contains minerals that leave white residue inside the tank, clog the nebulizer or wick, and shorten the unit’s life. Distilled water costs about $1 per gallon at most grocery stores and pays for itself in reduced maintenance. Reattach the tank firmly — a loose tank is the most common source of drips at the base.
Initial power-on and humidity calibration
Power the unit on at its lowest setting first. If your model has a built-in humidistat, set it to a value between 40% and 60% to start. If it doesn’t, pick up a standalone hygrometer and place it across the room, not next to the unit, for an accurate reading. ASHRAE recommends keeping indoor relative humidity between 40% and 60% for comfort and health. Below the lower end you’ll feel dry air discomfort; above the upper end you risk condensation and mold growth.
Give the unit 30–60 minutes to stabilize, then check your hygrometer. Adjust output up or down until you hit your target range.
Pro Tip: If you see condensation forming on windows or walls within the first hour, your output is already too high. Dial it back immediately and check your room size against the unit’s rated coverage area.
Daily and weekly care from day one
- Daily: Check the water level and top off with fresh distilled water. Never let stagnant water sit in the tank for more than 24 hours.
- Weekly: Empty the tank completely, rinse with clean water, and wipe the interior with a soft cloth.
The CDC notes that humidifiers can harbor bacteria and mold when not cleaned regularly, so building this habit from the first week matters.
Safety rules to follow from the start
- Keep the unit at least 3 feet from bedding, curtains, and upholstered furniture
- Plug directly into a GFCI outlet — never use an extension cord
- Keep out of reach of children and pets; hot-steam models pose a burn risk
- If you notice condensation on walls or a musty smell, reduce humidity output and check for mold signs
Should you hire a pro for a whole-house humidifier?
For most homeowners, yes. A whole-house humidifier integrates directly with your HVAC system — mounted to the supply or return plenum, connected to your water line, and wired to your furnace control board or a dedicated humidistat. Getting any one of those three connections wrong can mean water damage, an electrical fault, or a failed control board.
What the installation actually involves
There are three main types: bypass (uses furnace airflow), fan-powered (has its own fan), and steam (heats water independently). All three require:
- Cutting an opening in sheet metal ductwork
- Tapping into a water supply line
- Running low-voltage wiring to the furnace or humidistat
OSHA guidance is clear that cutting sheet metal requires gloves and eye protection; start with a pilot hole, use tin snips or a reciprocating saw, and flatten sharp edges before mounting. That’s before you’ve touched the plumbing or wiring. Incorrect wiring or a poorly sealed duct connection can cause control board failures and water damage that cost far more than a professional installation.
Manufacturer specs call for mounting on the supply plenum (or return if restricted), keeping the unit several inches above the furnace body to allow clearance for the solenoid and drain lines.
Homeowner checklist before the technician arrives
Preparing well cuts the technician’s time and your labor cost:
- Photos of your furnace, ductwork layout, and existing pipe type (copper or PEX)
- Confirm clearance space on the supply or return plenum
- Locate the nearest 120V outlet
- Note your preferred humidistat location (interior wall or return plenum, at least 8 inches upstream from the unit)
- Know whether your water shutoff is accessible
Pro Tip: After installation, verify four things yourself: ducts are sealed with foil HVAC tape (not standard duct tape), the drain hose slopes downward continuously, the humidistat is not in direct airflow, and there are no drips at the water connection after a 10-minute test run.
A confident DIYer with sheet metal, plumbing, and low-voltage wiring experience can follow a step-by-step whole-house guide — but if you’re unsure about any one of those three skill areas, the risk isn’t worth it. For a deeper look at how whole-house units fit into your HVAC system, the humidifier HVAC guide from Kcaircontrol covers the integration details clearly.
How to clean and maintain your humidifier
A consistent maintenance schedule is what separates a humidifier that lasts 5+ years from one that grows mold by February.
Maintenance calendar
- Daily: Empty and refill with fresh distilled water. Never leave standing water overnight.
- Weekly: Rinse the reservoir with clean water. Wipe the tank interior and base with a soft cloth.
- Monthly: Descale with undiluted white vinegar — fill the tank, let it soak 20–30 minutes, then rinse thoroughly. Follow with a dilute bleach solution (1 teaspoon of bleach per gallon of water) to disinfect, then rinse again until no bleach smell remains. Check the wick or filter and replace if discolored or stiff.
- Annually: Replace the water panel or evaporator pad on whole-house units. Schedule a professional HVAC maintenance visit to inspect the solenoid valve, drain line, and humidistat calibration.
Why tap water shortens your unit’s life
Minerals in tap water accumulate on the heating element, nebulizer, and wick, reducing output and forcing the motor to work harder. On ultrasonic models, those minerals become the white dust you see settling on furniture. Distilled water eliminates the problem at the source. If distilled isn’t practical, a demineralization cartridge (available for most major brands) is a reasonable second option.
Whole-house water panel replacement
Replace the water panel or evaporator pad once per heating season — typically in the fall before you start the unit. Keep a spare on hand so you’re not waiting on a delivery when temperatures drop. Ask your service technician to check the saddle valve or T-fitting connection at the same visit; saddle valves in particular are prone to slow leaks over time, and a T-fitting replacement is a more durable long-term fix.
Pro Tip: Before storing your portable unit for the summer, run it dry, clean it thoroughly, and let every component air-dry for 24 hours before reassembling and boxing it. Storing a damp unit guarantees mold by next fall.
Where to place your humidifier and what humidity level to target
Placement affects both performance and safety. A unit in the wrong spot either underperforms or creates moisture damage.
Portable placement rules:
- Level, water-resistant surface, minimum 2 feet off the floor
- At least 12 inches from walls, wood furniture, and electronics
- Away from direct airflow (vents, fans) that disperses mist before it can humidify the room
- Not in a corner — open placement allows mist to circulate
Whole-house placement rules:
- Mount to the supply plenum for most bypass and fan-powered models; return plenum if supply access is restricted
- Humidistat placement: at least 8 inches upstream from the unit on the return plenum, or on an interior wall away from exterior doors and windows
- Never mount directly on the furnace body — maintain the clearance the manufacturer specifies for solenoid and drain line access
What humidity level should you target?
ASHRAE’s guidance sets the comfort and health target for indoor relative humidity at 40–60%. Levels below this range can cause dry skin, static electricity, and irritation, while levels above it may cause condensation and mold growth.
If you see moisture beading on windows or walls, that’s your signal to reduce output immediately. Persistent condensation or a musty odor means you need to lower humidity further and inspect for mold. For moisture control that works in the other direction, whole-home dehumidification is the right tool in humid summers.
Electrical safety reminders:
- Always plug into a GFCI outlet near water sources
- Never run the power cord under a rug or through a doorway
- Shut off both water and power before any service on a whole-house unit
How to troubleshoot common humidifier problems
Most issues have a straightforward fix. Here’s how to diagnose the five most common ones.
White dust on furniture
Cause: mineral content in tap water. Switch to distilled water immediately, clean the base and nebulizer with white vinegar, and replace any discolored demineralization cartridge.
No mist or weak output
Check the water level first. If the tank is full, inspect the nebulizer or wick for mineral buildup and clean with vinegar. On evaporative models, a stiff or discolored wick won’t pass air properly — replace it. Also check that the fan is running; a seized fan motor usually means it’s time for a replacement unit or a repair call.
Noise and vibration
Set the unit on a flat surface and confirm it’s level. Tighten any loose panels. If the noise is a grinding or rattling from inside, the fan impeller may have debris caught in it — unplug the unit, remove the fan cover, and clear any obstruction carefully.
Leaks and pooling water
Inspect the tank gasket and base seal. A cracked gasket is a common culprit and usually inexpensive to replace. On whole-house units, check that the drain hose slopes continuously downward to the floor drain — any sag creates a pooling point. Stop operating the unit until the leak is fixed, and shut off the water supply line.
Pro Tip: On whole-house units, a leak at the water connection often traces back to a saddle valve that was installed with the handle pointing sideways or down. Reorienting the handle toward the ceiling reduces sediment clogging at the solenoid filter.
Over-humidity or condensation
Lower the humidistat setting by 5% increments. Open interior doors to improve air circulation. If the problem persists, check whether the humidistat is located near an exterior wall or in direct airflow — both cause false readings. Relocate it to an interior wall for accurate sensing.
- Lower humidistat by 5% and wait 30 minutes
- Open interior doors to improve circulation
- Check humidistat placement for drafts or cold surfaces
- If condensation continues, inspect for airflow blockages in the duct system
How long does setup take, and what does it cost?
Portable humidifier:
Unboxing, placement, and initial fill takes 10–30 minutes. Retail prices for quality portable units range from roughly $30 for a basic evaporative model to $150–$200 for a larger ultrasonic unit with a built-in humidistat. Ongoing costs are modest: distilled water and annual wick or filter replacements are the main recurring expenses.
Whole-house humidifier:
Homeowner prep (photos, clearing access, locating shutoffs) takes about 30–60 minutes. A technician’s installation time typically runs 2–6 hours, depending on duct access and whether electrical work is needed. Professional installation including parts and labor generally falls in the $300–$800 range for bypass and fan-powered models. Steam humidifiers cost more — both the unit and the installation — because of the additional electrical requirements.
Cost-efficiency tips:
- Program a humidity setback (lower the target by 5–10% during unoccupied hours) to reduce water and energy use
- Replace water panels on schedule; a clogged panel makes the system work harder and raises operating costs
- Keeping air ducts clean and sealed improves whole-house humidifier efficiency by preventing conditioned air from escaping before it reaches living spaces
Key Takeaways
Portable humidifiers are a quick homeowner setup; whole-house units require professional installation to avoid water damage, electrical faults, and HVAC control board failures.
| Point | Details |
|---|---|
| Use distilled water | Tap water minerals cause white dust, clog components, and shorten unit life. |
| Target 40–60% humidity | ASHRAE’s recommended range for comfort and health; condensation on windows means your setting is too high. |
| Portable setup time | Most portable units are running in 10–30 minutes with no tools required. |
| Whole-house: call a pro | Duct cuts, plumbing taps, and low-voltage wiring carry real risk if done incorrectly. |
| Kcaircontrol for installs | Kcaircontrol handles whole-house humidifier installation, maintenance, and diagnostics in the Kansas City area. |
What HVAC technicians actually see go wrong
The mistakes that cause the most expensive repairs aren’t the dramatic ones. They’re the quiet ones: a saddle valve installed at the wrong angle that drips for six months before anyone notices, a humidistat mounted on an exterior wall that reads 10% lower than the actual room humidity and runs the system constantly, or duct cuts sealed with standard duct tape that fails within a season and lets conditioned air bleed into the wall cavity.
Homeowners who attempt whole-house installs without sheet metal experience tend to underestimate how sharp duct edges are and how much force it takes to seat a mounting bracket squarely. The result is a unit that vibrates, leaks at the seal, or sits slightly off-angle so the drain hose doesn’t slope correctly. None of these are catastrophic on day one. All of them become expensive by year two.
The practical advice: if you’re comfortable with a portable unit and want to stop there, you’ll get real comfort benefits with minimal risk. If you’re considering a whole-house install, the honest threshold is this — if you’ve never cut sheet metal, tapped a water line, or run low-voltage wiring, stop before you start and call a licensed technician. The cost of a professional install is almost always less than the cost of fixing a DIY mistake that’s been quietly damaging your system.
Kcaircontrol handles the hard part of humidifier installation
Getting a portable unit running is something you can do this afternoon. But when the job involves your furnace, your ductwork, and your water supply, the stakes are different. Kcaircontrol’s HVAC technicians in the Kansas City area handle whole-house humidifier installation, humidistat calibration, and post-install leak testing as part of a complete service visit — so you’re not guessing whether the drain slope is right or whether the low-voltage wiring is correctly terminated.

If you’re dealing with a persistent leak, a control board issue, or a whole-house unit that’s never performed the way it should, Kcaircontrol also provides HVAC diagnostics and repair for exactly those situations. Related services include furnace repair, furnace tune-ups, duct sealing, and indoor air quality assessments. Request an estimate or schedule a diagnostic visit at kcaircontrol.com.
Useful sources and manufacturer guidance
These are the primary references worth bookmarking for your specific unit and situation:
- ASHRAE humidity standards — the source for the 40–60% indoor relative humidity target used throughout this guide
- U.S. EPA humidifier guidance — covers water quality, cleaning frequency, and health considerations for portable units
- CDC waterborne germ prevention — explains why regular cleaning and fresh water matter for humidifier hygiene
- OSHA sheet metal safety — PPE and procedural guidance for anyone cutting ductwork
- Your humidifier’s owner’s manual — always the first reference for model-specific mounting templates, clearance dimensions, cleaning chemicals to avoid, and warranty conditions. Save a digital copy and photograph your installation for any future service call.
Recommended
- What Is a Humidifier for HVAC? A Homeowner’s Guide – KC Air Control – Heating & Cooling
- Role of humidifiers in HVAC: a Kansas City homeowner’s guide – KC Air Control – Heating & Cooling
- How to Install HVAC System for Home Comfort – Air Control
- Step by Step Furnace Upgrade for Homeowners – KC Air Control – Heating & Cooling