
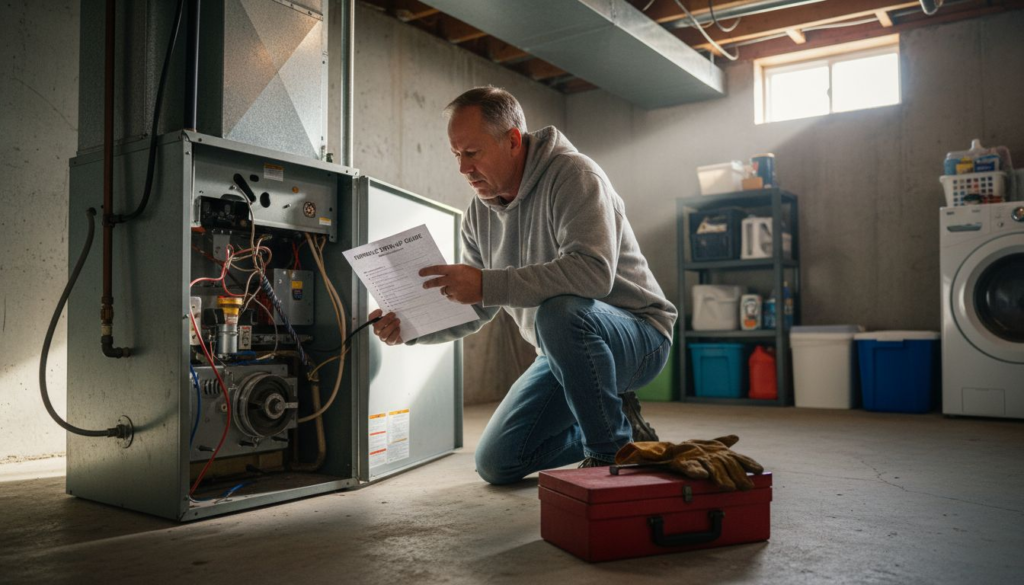
Kansas City winters can test the limits of your furnace, and nothing is more frustrating than losing heat just when you need it most. Facing a silent or malfunctioning furnace doesn’t always mean you need an expensive repair—sometimes, a quick check can solve the issue before you call a technician.
This list will show you practical troubleshooting steps that address the most common heating problems. You’ll learn how to handle issues like incorrect thermostat settings, dirty air filters, and power supply interruptions—all problems that often have straightforward fixes.
Get ready to discover simple solutions that can bring warm air back into your home, help you avoid unnecessary repair bills, and keep your family comfortable all season long.
Table of Contents: Your Furnace Troubleshooting Checklist
- 1. Check Thermostat Settings and Battery
- 2. Inspect Air Filters for Blockages
- 3. Examine Furnace Power and Circuit Breaker
- 4. Review Pilot Light and Ignition System
- 5. Identify Unusual Noises or Smells
- 6. Test Airflow from Vents and Ducts
Quick Summary
| Takeaway | Explanation |
|---|---|
| 1. Replace Thermostat Batteries Regularly | Fresh batteries are crucial for proper thermostat operation, preventing heating issues and potential comfort disruptions. |
| 2. Inspect and Replace Air Filters Every Three Months | Clean filters ensure optimal airflow, prolong furnace life, and prevent inefficiencies due to blockages. |
| 3. Check Circuit Breaker Before Calling for Repairs | A tripped breaker often causes heating failures, and checking it requires no technical knowledge and takes only a minute. |
| 4. Monitor Unusual Noises and Smells | Strange sounds or odors indicate underlying issues; addressing them early can prevent costly repairs and enhance safety. |
| 5. Test Airflow for Even Distribution | Verify airflow from all vents to identify blockages; signs of restricted airflow often indicate duct issues or blocked vents. |
1. Check Thermostat Settings and Battery
Your thermostat is the command center of your furnace system. If your heating isn’t working properly, this is where troubleshooting begins.
A thermostat controls heating by sending signals to your furnace to turn on or off based on your set temperature. When something feels off with your heating, the problem often traces back to thermostat issues rather than the furnace itself. This means you can potentially fix the problem without calling a technician.
Why Your Thermostat Matters
Think of your thermostat as the brain of your heating system. It continuously monitors your home’s temperature and communicates with your furnace to maintain comfort. When the thermostat fails to work correctly, your furnace either won’t run when needed or runs inefficiently.
Fluctuating batteries are one of the most common culprits behind furnace malfunctions. A weak battery can cause your thermostat to lose power intermittently, preventing it from sending proper signals to your furnace.
Fresh thermostat batteries are often the difference between a heating system that works and one that doesn’t.
Here’s what you need to check:
- Verify your thermostat displays correctly on the screen
- Look for low battery warning indicators
- Check if the display is blank or dimmed
- Confirm the thermostat is set to “heat” mode, not “cool” or “off”
- Ensure your temperature setting is above the current room temperature
How to Troubleshoot Your Thermostat
Start by examining your thermostat’s display. If it looks dim or shows an error message, battery issues are likely at play. Many thermostats show a battery icon or warning when power is running low.
Next, check the actual temperature setting. Your furnace won’t run if the thermostat is set to a lower temperature than your home currently maintains. For example, if your home is 68 degrees and your thermostat is set to 65, the furnace stays off.
Verify you’re in the correct mode. If the thermostat is switched to cooling, heating, or off mode instead of heat, your furnace won’t activate. The mode selector should clearly show “heat” during winter months.
Common HVAC problems often stem from thermostat issues that homeowners can fix themselves. Resetting the thermostat and verifying settings can resolve many heating complaints before professional service is needed.
Battery Replacement Steps
Replacing thermostat batteries takes just a few minutes:
- Turn off your furnace at the main switch
- Remove the thermostat cover or access the battery compartment
- Note which type of batteries are inside (typically AA or AAA)
- Replace old batteries with fresh ones of the same type
- Replace the cover and turn your furnace back on
- Check if the display illuminates and shows correct settings
If your thermostat still malfunctions after fresh batteries, the device itself may need professional attention. But this simple step resolves issues about 40% of the time.
Pro tip: Mark your calendar to replace thermostat batteries twice yearly, ideally when daylight saving time changes occur, so you never face heating failures due to dead batteries.
2. Inspect Air Filters for Blockages
Your furnace’s air filter is like a bouncer at the door of your heating system. It keeps dirt and debris out, but when it gets clogged, everything backs up.
A dirty or clogged air filter restricts the airflow your furnace needs to operate efficiently. When air can’t flow freely, your furnace has to work much harder to push heat through your home. This extra strain can cause short-cycling, reduced heating, and even system failures.
Most Kansas City homeowners don’t realize how quickly filters accumulate dirt. Pets, dust, and regular household debris collect fast, especially during heating season when your furnace runs constantly.
Why Filter Blockages Matter
Think of airflow as the lifeblood of your furnace. Without proper airflow, the system overheats internally and can trip safety switches that shut everything down. A blocked filter forces your furnace motor to work overtime, which shortens its lifespan significantly.
Dirty filters are a leading cause of furnace inefficiency and short-cycling, meaning your furnace runs, reaches the desired temperature, but then cycles on and off repeatedly. This wastes energy and prevents your home from staying warm consistently.
Replacing your air filter every three months is one of the cheapest ways to prevent furnace problems and keep your system running smoothly.
When a filter becomes too blocked, your furnace can overheat and potentially activate the limit switch, which is a safety feature designed to prevent damage. This stops your furnace from operating until the problem is fixed.
How to Inspect Your Filter
Your furnace filter is typically located in a return air duct or blower compartment. Finding it takes just a few minutes of exploration in your basement or utility closet.
Once you locate the filter, here’s what to check for:
- Visible dust or dirt caked on the filter surface
- Discoloration or darkening compared to a fresh filter
- Restricted airflow when you hold the filter up to light
- Pet hair or debris accumulation
- A filter that feels stiff or rigid instead of flexible
Hold the filter up to natural light. You should be able to see through it clearly. If light barely passes through, the filter needs replacement immediately.
Check your filter every month, even if you’re replacing it quarterly. Kansas City’s varying seasons and heating demands mean some months require more frequent checks than others. High-efficiency filters and homes with pets often need replacement every 4 to 6 weeks.
Filter Replacement Steps
- Turn off your furnace before starting
- Note the filter size (usually printed on the frame)
- Remove the old, dirty filter
- Vacuum the filter housing to remove loose dust
- Insert the new filter with the arrow pointing toward the furnace
- Restart your furnace and monitor performance
Keeping your filter clean also benefits your indoor air quality by removing more contaminants from the air your family breathes daily.
Pro tip: Set a phone reminder for every three months to check and replace your filter, and buy filters in bulk to save money while ensuring you always have the correct size on hand.
3. Examine Furnace Power and Circuit Breaker
Before you assume your furnace has a major problem, check if it has power at all. A tripped circuit breaker or blown fuse can shut down your entire heating system instantly.
Your furnace relies on electrical power to ignite the burner, run the blower motor, and control all safety systems. If power is cut off, nothing happens, no matter how well the furnace itself is functioning. This is why power supply inspection is always the first troubleshooting step.
Many homeowners call for expensive repairs when the real culprit is simply a flipped breaker switch. It’s an easy fix that takes seconds and costs nothing.
Understanding Your Circuit Breaker
Your home’s electrical panel contains circuit breakers that protect your furnace and other appliances from electrical overload. When too much electricity flows through a circuit, the breaker automatically trips to prevent damage and fire hazards.
A furnace typically uses a dedicated 15 or 20 amp circuit breaker. If that breaker trips, your furnace loses power immediately and won’t operate until the breaker is reset.
A blown fuse or tripped breaker will completely cut off power to your furnace, preventing it from operating at all.
Checking the circuit breaker for any tripped breakers is a key troubleshooting step that often restores your furnace to normal operation. The good news is this check takes just a minute and requires no technical knowledge.
Breakers can trip for several reasons. An overloaded circuit, a short circuit in the furnace, or simply normal wear over time can all cause this. Your job is simply to identify if one has tripped and reset it if needed.
How to Check Your Circuit Breaker
Locate your electrical panel, usually in the basement, garage, or utility closet. Open the cover and look at the switches inside.
Each breaker should be in the fully ON position. A tripped breaker will be in the middle position or partially switched off. Some breakers show a red or orange indicator when tripped.
Follow these steps:
- Locate the furnace circuit breaker (check your panel legend or labeling)
- Verify if the breaker is in the ON or OFF position
- If it’s tripped (middle or OFF position), switch it fully OFF first
- Wait 5 seconds, then switch it back ON
- Check if your furnace restarts and begins heating
If the breaker trips again immediately after you reset it, your furnace may have an electrical problem requiring professional service. Don’t continue resetting it, as this could cause damage.
Checking Your Furnace Fuse
Some furnaces have their own fuse located inside the unit or near it. Unlike circuit breakers, fuses cannot be reset. A blown fuse must be replaced with an identical new fuse.
If you find a blown fuse with a darkened or broken filament inside, replace it with the exact same amperage rating. Using the wrong fuse size can damage your furnace or create electrical hazards.
Pro tip: Keep a spare furnace fuse of the correct amperage in your utility closet so you can make quick replacements without waiting for a service call.
4. Review Pilot Light and Ignition System
Your furnace needs a spark to get started, just like a car engine. If the pilot light or ignition system fails, your furnace can’t generate heat no matter how hard it tries.
Modern gas furnaces use one of two ignition systems. Older models rely on a pilot light, a small flame that continuously burns and ignites the main burner. Newer furnaces use a hot surface ignitor, an electric element that heats up to light the gas when needed.
When either system fails, your furnace won’t ignite, leaving you without heat during cold Kansas City winters.
How the Pilot Light Works
A pilot light is a small, controlled flame that stays lit continuously in your furnace. When your thermostat calls for heat, gas flows to the main burner, and the pilot light ignites it automatically.
The pilot light system includes a thermocouple, a safety device that detects the pilot flame. If the flame goes out, the thermocouple shuts off the gas supply to prevent dangerous gas buildup in your home.
If your pilot light keeps going out, several issues could be responsible. A draft blowing it out, a faulty thermocouple, or debris blocking the pilot orifice are common culprits.
Understanding the Hot Surface Ignitor
Newer furnaces use a more efficient ignition system called a hot surface ignitor. This ceramic or metal element heats to extremely high temperatures when electricity flows through it, igniting the gas without needing a continuously burning flame.
When a gas furnace does not ignite, the hot surface ignitor or pilot light system is often the cause. If the ignitor fails, no ignition occurs and your furnace won’t produce heat.
A failing ignition system is one of the most common reasons for furnace shutdown, but it’s often a straightforward repair.
The ignitor heats up for just a few seconds before the gas ignites. Once the burner is lit, the ignitor shuts off and the flame maintains itself.
Signs Your Ignition System Needs Attention
Watch for these warning indicators:
- Furnace clicks repeatedly but doesn’t ignite
- Pilot light won’t stay lit or goes out frequently
- You smell gas but the furnace isn’t producing heat
- Furnace cycles on and off without maintaining temperature
- No ignition sound or clicking when the thermostat calls for heat
What You Can Check
If your furnace won’t ignite, start with these simple checks before calling a technician.
- Verify your thermostat is set to heat mode and above room temperature
- Confirm your circuit breaker hasn’t tripped
- Check if the pilot light is visible (on older models) and lit
- Look for visible debris or blockages around the pilot orifice
- Listen for clicking sounds when the furnace tries to ignite
If the pilot light is out, some furnaces have a reset button you can press. Consult your furnace manual for specific instructions for your model.
Ignitor replacement is relatively simple and inexpensive compared to other furnace repairs. If you’ve verified everything else and ignition still fails, a professional technician can diagnose whether the ignitor, thermocouple, or another component needs replacement.
Pro tip: Take a photo of your furnace model and serial number with your phone and keep it handy so you can quickly reference your manual or contact a technician with accurate information.
5. Identify Unusual Noises or Smells
Your furnace is trying to tell you something. Strange sounds and odors are warning signals that something needs attention before a bigger problem develops.
Your ears and nose are powerful diagnostic tools. A healthy furnace operates quietly and produces no odors. When that changes, it’s time to investigate. Unusual noises and smells are early warning signs that can prevent costly damage and safety hazards.
Learning to recognize these signals helps you catch problems early and decide whether you can handle the issue yourself or need professional help.
Common Furnace Noises and What They Mean
Different sounds indicate different problems. A banging or popping sound often means metal is expanding and contracting as it heats and cools, which is usually harmless but worth monitoring.
A grinding or squealing noise typically signals a problem with the blower motor or bearings. These components are wearing out and may need lubrication or replacement soon.
Unusual noises like banging or rattling often indicate furnace problems, including mechanical failure, loose components, or airflow issues. Ignoring these sounds can lead to more serious damage down the road.
A rumbling sound from your furnace might indicate a delayed ignition problem or dirty burners. Gas is building up before ignition occurs, creating that rumble when it finally ignites.
A rattle or loose component sound suggests something inside your furnace has come loose. This could be a panel, screw, or internal component vibrating against the cabinet.
Recognizing Problem Smells
Pay close attention to any unusual odors coming from your furnace or vents. Here are the most concerning smells:
- Burning smell: Indicates overheating, dust on heating elements, or electrical problems
- Gas odor: A rotten egg smell suggests a gas leak, which requires immediate professional attention
- Musty smell: Points to mold or moisture buildup in your ductwork or furnace
- Chemical smell: May indicate refrigerant leak or electrical component failure
Detecting unusual smells and noises early prevents further damage and addresses potential safety concerns.
A slight burning smell when your furnace first starts after sitting unused all summer is usually normal. It’s just dust burning off the heating elements. However, a persistent burning smell or one that occurs repeatedly throughout the season needs investigation.
When to Act Immediately
Some smells and sounds demand urgent action. Don’t wait if you notice these warning signs:
- Strong gas smell that persists (shut off furnace and call gas company)
- Electrical burning smell or visible sparks
- Loud banging accompanied by furnace shutdown
- Acrid or chemical smell you can’t identify
- Moldy smell indicating moisture and mold growth
If you smell gas, leave your home immediately and call your gas provider’s emergency line from outside. Don’t use electrical switches or create any sparks. This is a genuine safety emergency.
Document and Describe
When something seems off, pay attention to the details. Note when the sound or smell occurs, what it sounds like, and how long it lasts. Is it constant or intermittent? Does it happen during startup, shutdown, or all the time?
These details help a technician diagnose the problem more quickly and accurately. Your description can mean the difference between a simple fix and unnecessary system replacement.
Pro tip: Record a short video or audio clip of the unusual noise on your phone so you can play it for a technician, helping them identify the exact problem during a service call.
6. Test Airflow from Vents and Ducts
Your furnace can run perfectly, but if air isn’t reaching your home, you won’t feel the heat. Testing airflow reveals whether your distribution system is working properly.
Airflow is the path warm air travels from your furnace through ducts and out vents into your living spaces. When airflow is blocked or restricted, your furnace runs longer and consumes more energy while your home stays cold.
This final troubleshooting step helps you identify whether the problem is with your furnace itself or with how heat is being distributed throughout your home.
Why Airflow Matters
Your furnace generates heat, but the blower fan distributes it. If ducts are blocked, leaking, or damaged, all that warm air never reaches you. The furnace keeps running, trying to meet the thermostat’s temperature demand, but fails because the heat is escaping or stuck.
Restricted airflow causes your furnace to work harder and overheat internally. This strain shortens the lifespan of expensive components and wastes energy, raising your heating bills significantly.
Proper airflow through your duct system is essential for your furnace to operate efficiently and keep your home comfortable.
Proper airflow is critical for furnace efficiency and comfort. When ducts are blocked or damaged, the furnace must run longer while failing to warm your home properly, wasting both energy and money.
How to Test Airflow
Start by checking if warm air is actually coming from your vents. This simple test takes just a few minutes and requires no tools.
Follow these steps:
- Set your thermostat to heat mode and raise the temperature above room temperature
- Wait 1 to 2 minutes for the furnace to start
- Walk through your home and feel the air coming from each vent
- Compare airflow strength between different rooms and vents
- Check both supply vents (where warm air comes out) and return vents (where air gets pulled back)
Warm air should flow steadily from all vents. If some vents have weak airflow while others are strong, you likely have a blockage or duct issue in the weak areas.
Checking for Blockages
Blockages prevent air from flowing freely through your ducts. Common culprits include:
- Furniture or items blocking vents
- Closed or partially closed dampers inside ducts
- Dust and debris accumulation in ducts
- Disconnected or damaged ductwork
- Collapsed sections of flexible ducting
- Insulation falling into ducts during construction
Start by checking if any supply vents are blocked by furniture. Move items away from vents to ensure clear airflow. Next, check if basement or attic dampers are fully open to allow air through those sections.
Ductwork Inspection
Look for visible damage in accessible ducts. In your basement or attic, check for separated joints, holes, or crushed flexible ducts. Leaking or damaged ducts reduce airflow efficiency and cause warm air to escape into unconditioned spaces.
Torn or disconnected ductwork is a serious efficiency problem. Sealing duct leaks with mastic sealant or specialized tape can significantly improve heating performance and reduce energy waste.
If you find extensive damage or can’t locate blockages despite weak airflow, professional duct cleaning and sealing may be necessary. Experts can identify hidden blockages and ensure your entire system works optimally.
Listening for Blower Operation
Your furnace’s blower fan should run when the thermostat calls for heat. Stand near your furnace and listen for the blower motor running. You should hear a steady humming sound.
If you don’t hear the blower running at all, the motor may have failed or electrical power isn’t reaching it. If the blower runs but airflow is weak everywhere, the motor may be struggling or the filter may be extremely dirty.
Pro tip: Use a tissue or lightweight paper held near each vent to visually confirm airflow; the paper should move noticeably with strong airflow, helping you quickly identify weak spots in your distribution system.
Below is a comprehensive table summarizing the key troubleshooting steps, important concepts, and maintenance procedures discussed in the article regarding furnace system efficiency and functionality.
| Topic | Details | Actions & Tips |
|---|---|---|
| Thermostat Settings | The thermostat controls furnace operation and is crucial for proper heating functionality. | Check and replace batteries if necessary, verify settings, and reset when troubleshooting. |
| Air Filters | Air filters prevent debris from entering the furnace system but can clog and hinder performance. | Inspect monthly for buildup, replace every 3 months, and consider more frequent changes in dusty conditions. |
| Electrical Circuit | The furnace relies on electrical power for operation; a tripped circuit breaker can halt performance. | Locate and reset circuit breakers, or replace fuses if blown. Ensure correct amperage for replacement. |
| Ignition System | A working pilot light or hot surface ignitor enables gas ignition. Faults can stop heating. | Check for visible pilot flame or debris around the ignitor. Replace faulty components as needed. |
| Noises and Smells | Odd furnace sounds or odors can signal mechanical problems or safety hazards. | Document occurrences and contact a technician for significant or persistent issues like gas odors. |
| Airflow Issues | Duct blockages or damages can restrict heat distribution throughout the home. | Test airflow at vents, clear obstructions, and inspect ducts for leaks or damage. Repair as required. |
Don’t Let Furnace Troubles Leave You in the Cold
Struggling with persistent furnace issues like thermostat malfunctions, clogged filters, or faulty ignition systems is frustrating and can leave your home uncomfortable and cold. This checklist pinpoints common problems that may be stopping your furnace from working efficiently. If you want to avoid the hassle and risk of costly repairs or system failure, reliable professional support is essential.
At KC Air Control, we understand how vital dependable heating is during the coldest Kansas City months. Our experienced team offers expert furnace repair, maintenance, and replacements backed by over 70 years of trusted service. Visit our Importance Of Maintenance – Air Control page to learn how regular upkeep prevents issues before they start. Ready to experience consistent warmth and peace of mind? Schedule your service today at https://kcaircontrol.com and trust the local HVAC experts who put your comfort first. For more tips and insights, explore our Uncategorized – Air Control articles and protect your home’s heating performance now.
Frequently Asked Questions
How can I check my thermostat settings to troubleshoot my furnace?
Start by ensuring the thermostat display is functioning correctly and set to heat mode. Adjust the temperature setting to a value higher than the current room temperature, and replace the batteries if necessary to ensure proper functionality.
What should I do if my furnace is not receiving power?
Check the circuit breaker to see if it has tripped and reset it if needed. If the breaker flips again, this indicates a possible electrical issue that may require professional assistance.
How often should I inspect and replace my air filter?
Inspect your air filter every month and replace it every three months under normal conditions. If you have pets or heavy dust in your home, consider replacing it every 4 to 6 weeks to maintain optimal airflow.
What are the signs that my furnace’s ignition system needs attention?
Common signs include the furnace clicking repeatedly without igniting, the pilot light going out frequently, or unusual smells like gas. If you notice these symptoms, check your thermostat settings, inspect the pilot light, and consult a professional if issues persist.
How can I test the airflow from my furnace vents?
Raise your thermostat setting above the current room temperature and feel the airflow from each vent after the furnace has been running for a few minutes. If you notice weak airflow from some vents, check for blockages or schedule a duct inspection to ensure proper distribution of warm air.
Recommended
- Furnace Repair – Air Control
- Furnace tune-up – Air Control
- Why Schedule HVAC Maintenance: Protect Your Comfort – Air Control
- Book Online – Air Control
- 7 Steps for a Residential HVAC Maintenance Checklist – Akita AC
- 7-Step Field Service Management Checklist for HVAC Efficiency
- Heating Your Cabin With A Gas Heater – Log Cabin Kits To Buy Online
Tried abcvipj88 and I’m liking the bonuses they offer. It’s a good way to stretch your betting budget. A good platform for users. Join us here for more fun abcvipj88
Pingback: Why Maintain Your Furnace: Cut KC Heating Costs 15% in 2026 - KC Air Control - Heating & Cooling