
TL;DR:
- Homeowners can safely clean their air vents using basic tools like a vacuum, screwdriver, and mild soap. Routine maintenance improves indoor air quality and HVAC efficiency, but red flags such as mold or pest activity require professional inspection. Regular cleaning, combined with timely filter changes, helps prevent dust buildup and promotes healthier indoor environments.
Yes, you can clean your home’s air vents yourself, and most homeowners can do it safely with a vacuum, a screwdriver, mild dish soap, and basic protective gear. The benefits for your home and health are real: cleaner registers reduce recirculated dust, help your HVAC system run more efficiently, and improve indoor air quality without a service call.
Fastest safe method at a glance:
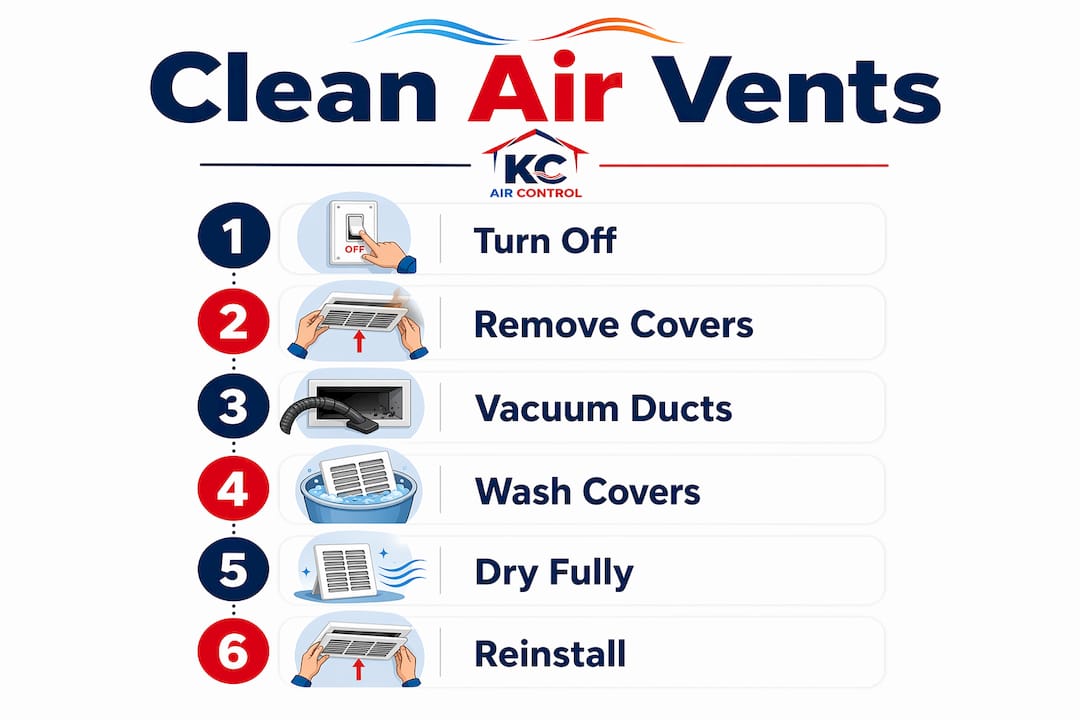
- Turn the thermostat to OFF before touching anything
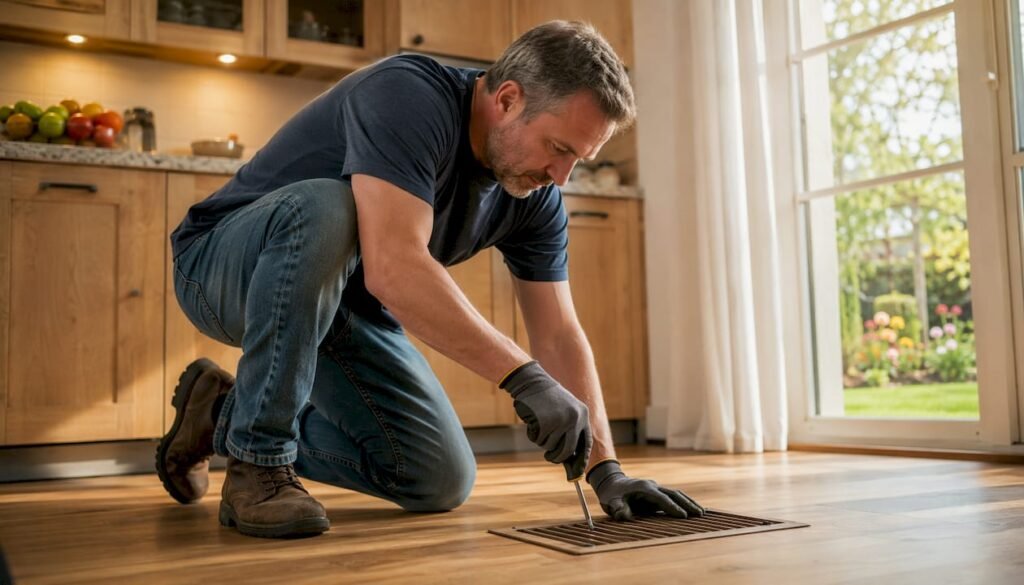
- Remove vent covers with a screwdriver
- Vacuum the opening with a brush or crevice attachment
- Wash covers in warm soapy water, rinse, and dry completely
- Reinstall only when fully dry, then run the fan for 30 minutes
Stop and call a professional if you find any of these:
- Visible black, green, or white mold growth inside the duct opening
- Rodent droppings, insect activity, or nesting material
- Heavy, matted clumps of dust being blown out of registers
- A persistent musty odor that returns after cleaning
The EPA confirms that routine whole-system duct cleaning is not required unless one of those specific problems exists. Surface-level vent maintenance is squarely in DIY territory. Anything deeper belongs to a certified professional.
Table of Contents
- What tools and PPE do you need before you start?
- How to clean air vents step by step
- How does the method change for different vent types?
- Deep cleaning vent covers and registers
- How far should you vacuum inside ducts?
- Essential safety rules every DIYer must follow
- When should you call a professional instead of doing it yourself?
- How often should you clean vents and maintain your system?
- How do you know if you have mold in your air vents?
- What do EPA and NADCA guidance actually say?
- Key Takeaways
- What technicians actually see homeowners get wrong
- Kcaircontrol handles what DIY can’t reach
- Useful sources and next steps
What tools and PPE do you need before you start?
Gathering everything before you pull the first screw saves you mid-task trips and keeps the job safe. Here is what actually matters.
Essential tools and materials:
- Vacuum cleaner with a hose, crevice tool, and soft brush attachment
- Flathead and Phillips screwdrivers (most registers use one or the other)
- Microfiber cloths (at least two, one damp and one dry)
- Bucket with warm water and a few drops of mild dish soap
- Soft-bristled brush or an old toothbrush for crevices
Recommended PPE:
- N95 or P100 respirator mask: duct openings release concentrated dust and potential allergens the moment you remove a cover
- Disposable gloves: protect skin from dust, mold spores, and cleaning solution
- Safety glasses or goggles: ceiling vents drop debris directly into your eyes
Optional but helpful:
- Shop vac for heavy debris loads
- Extendable duster for ceiling registers you cannot easily reach
- Painter’s tape and a marker to label covers before removal (especially useful in homes with many similar-looking registers)
- Phone or camera to photograph the screw pattern and duct condition before you start
Pro Tip: If you don’t have a brush attachment, wrap a microfiber cloth around the vacuum hose and secure it with a rubber band. It traps dust without scratching the duct boot.
How to clean air vents step by step
This procedure covers the most common ceiling, wall, and floor registers. Budget roughly 10–15 minutes per vent for a thorough job.
-
Turn off the HVAC system. Set the thermostat to OFF. For extra safety, flip the air handler breaker before removing multiple registers at once. Running the system while covers are off pulls loose dust directly into the ductwork.
-
Lay drop cloths. Place an old sheet or drop cloth under ceiling vents. Debris falls fast and lands on furniture if you skip this.
-
Put on your PPE. Mask, gloves, and eye protection go on before the first cover comes off.
-
Remove the vent cover. Unscrew the register and set screws in a small container. If the cover feels stuck, it may be painted over at the seam. Score lightly around the edge with a utility knife before prying to avoid tearing drywall or paint.
-
Vacuum the duct boot and opening. The duct boot (the metal transition between the register and the duct) traps a disproportionate amount of dust and is the single most productive spot to focus your vacuum. Use the brush attachment to loosen dust, then switch to the crevice tool. Reach only as far as the hose goes naturally, typically 6–18 inches. Do not force the hose into flexible duct sections.
-
Inspect the opening. Use a flashlight or your phone camera to check for mold, moisture, pest activity, or heavy debris. If you see any red-flag conditions, stop, replace the cover loosely, and call a pro.
-
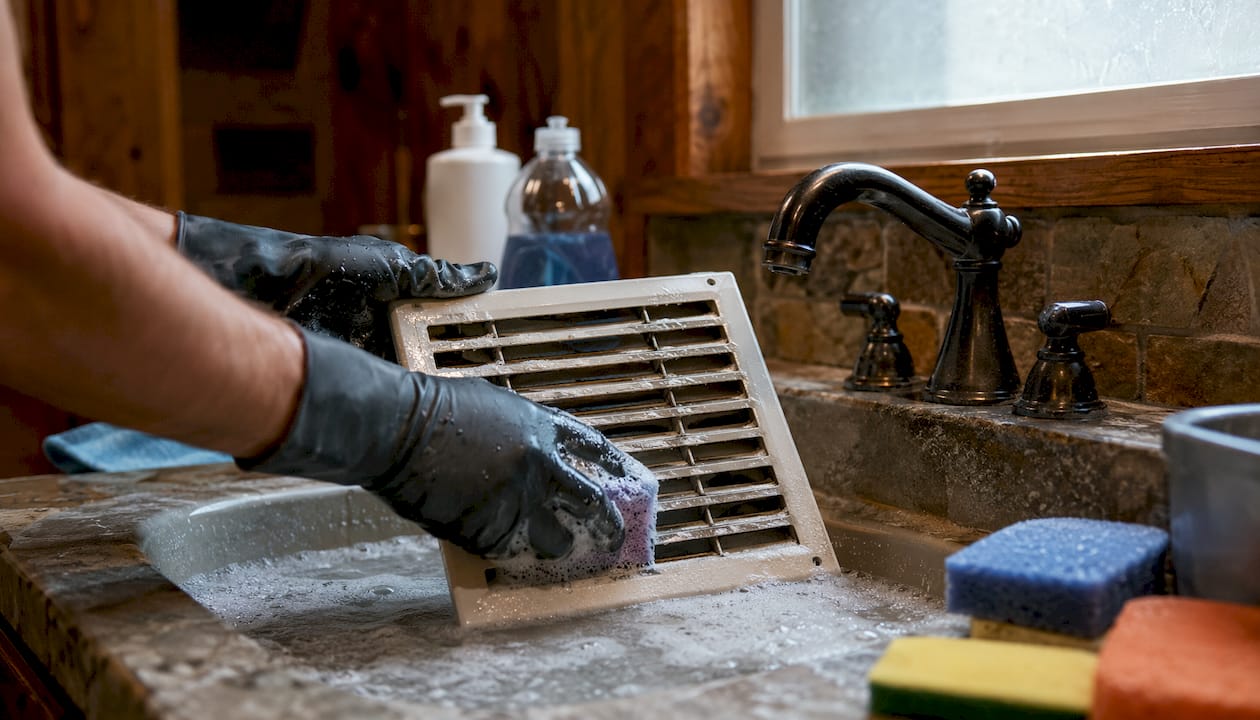
Wash the cover. Soak in warm soapy water for 10–15 minutes, scrub crevices with a soft brush, rinse thoroughly, and set aside to dry completely before reinstallation. Even small amounts of residual moisture on an attached cover can promote mold growth when the system cycles.
-
Wipe the surrounding wall, floor, or ceiling. A damp microfiber cloth around the vent opening catches any dust the vacuum missed and prevents it from settling back onto the cover.
-
Reinstall the cover. Align it carefully and tighten screws snugly. Avoid overtightening, which can strip the anchor or bend metal frames and cause rattles when the fan runs.
-
Run the fan for 30 minutes, then do the white-cloth test. Hold a clean white microfiber cloth over the vent for 10 seconds while the fan runs. Dark specks on the cloth signal a significant remaining dust load and may indicate the system needs a deeper professional clean.
Pro Tip: Label each cover with painter’s tape before removal (e.g., “Master BR ceiling,” “Hallway floor”). Registers look identical once they’re off, and reinstalling the wrong size in the wrong opening is a surprisingly common mistake.
How does the method change for different vent types?
The core steps above apply to every register, but material and design affect a few details.
-
Metal grilles and painted registers: Avoid abrasive scrubbing pads, which scratch powder-coat finishes. If the cover is painted flush to the wall, score the paint seam with a utility knife before prying to prevent tearing drywall. Dry metal covers thoroughly to prevent rust.
-
Plastic registers: Warm soapy water works well, but skip high-heat drying methods. A hair dryer on high or a warm oven rack can warp plastic louvers permanently. Air-dry at room temperature.
-
Floor registers and cast-iron covers: Angle the vacuum nozzle downward and check for rust on the underside. After washing, dry immediately with a cloth and let them air-dry fully before reinstalling. Cast iron holds moisture and rusts quickly if left damp.
-
Linear slot diffusers and concealed ceiling diffusers: These narrow openings require a long, flexible soft brush rather than a vacuum hose. Avoid pushing a vacuum attachment deep into slot diffusers; the internal baffles are easy to dislodge. If the diffuser is recessed and inaccessible, professional cleaning is the safer call.
Deep cleaning vent covers and registers
Routine vacuuming handles most buildup, but covers that haven’t been cleaned in a year or more need a more thorough approach.
- Pre-vacuum. Remove loose dust before soaking so you’re not washing grime back into the louvers.
- Soak in warm soapy water for 10–15 minutes. For greasy kitchen registers, add a splash of white vinegar or a small amount of degreaser to the bucket.
- Scrub crevices with a soft brush or old toothbrush. Work along the louvers, not across them, to push debris out rather than pack it in.
- Rinse thoroughly under running water until the water runs clear.
- Dry completely. Pat with a dry microfiber cloth, then air-dry for at least an hour. Never reinstall a damp cover.
Material-specific notes:
- Painted wood or decorative wood covers: do not soak. Wipe with a barely damp cloth and dry immediately.
- Ornate cast or stamped metal covers: use a microfiber cloth rather than a stiff brush to protect fine detail.
- Rusted metal: apply a small amount of a gentle rust remover, rinse well, and dry immediately. Persistent deep rust that compromises the frame means the cover should be replaced.
When to replace instead of clean: Brittle plastic that cracks when flexed, severe corrosion that pits through the metal, or bent louvers that no longer direct airflow properly are all signs a new cover is the better investment.
Pro Tip: To dry narrow louvers quickly, use a hair dryer on its lowest heat setting held several inches away. Move it continuously to avoid warping plastic or blistering paint.
How far should you vacuum inside ducts?
DIY vacuuming is effective for the accessible portion of the duct, and knowing the limits prevents damage.
- Reach only as far as the hose and crevice tool go naturally, typically 6–18 inches from the register opening. That zone, centered on the duct boot, holds the largest concentration of settled dust.
- Technique: Use the brush attachment first to loosen dust from the duct walls, then switch to the crevice tool to vacuum it up. Move in a slow circular and side-to-side pattern rather than pushing straight in and out.
- Do not force the hose into flexible duct sections. Flexible duct has a foil-and-plastic liner that tears easily, and a puncture creates a leak that pulls conditioned air into wall cavities.
- Do not use compressed air to blow dust out of ducts. It disperses particles throughout the home and can dislodge insulation inside duct walls.
- Do not spray detergents, bleach, or biocides into duct openings. The EPA specifically warns against routine biocide application in ducts, and moisture introduced this way promotes mold growth.
- Do not drill into ducts to access hard-to-reach sections. That work belongs to a professional with proper containment equipment.
When visible dust persists after vacuuming the accessible zone, or when you suspect buildup deeper in the system, a truck-mounted negative-pressure vacuum with a borescope camera is the right tool. That is professional territory.
Essential safety rules every DIYer must follow
A few non-negotiable precautions protect both you and your HVAC system.
- Always turn the system off at the thermostat first. When possible, also kill power at the air handler breaker, especially when cleaning multiple registers in one session.
- Wear your PPE every time. Dust from duct openings contains concentrated allergens, mold spores, and fine particulates. An N95 mask, gloves, and eye protection are not optional if you have allergies or asthma, and they are good practice for everyone.
- Never reinstall a damp cover. Moisture trapped between a cover and the duct boot creates the exact warm, dark, humid environment where mold thrives.
- Keep water away from the duct opening. Wet-cleaning while covers are attached introduces moisture into the system. Clean covers off the duct, dry them fully, then reinstall.
A note on older homes and asbestos: If your home was built before 1980 and the duct insulation or surrounding materials look like gray or white fibrous wrap, do not disturb them. Asbestos-containing insulation was common in older HVAC systems. Stop work, leave the area, and contact a licensed asbestos abatement professional before proceeding with any duct or vent work.
When should you call a professional instead of doing it yourself?
Surface-level DIY vent cleaning is safe and effective for routine maintenance, but certain conditions require professional tools and training.
Call a pro if you find any of the following:
- Visible mold growth inside the duct opening or on the register itself
- Rodent droppings, insect activity, or signs of nesting
- Clumps of matted dust being blown out of supply registers
- Standing water or moisture inside the duct boot
- A persistent musty odor that returns within days of cleaning
- Significantly reduced airflow from one or more registers after cleaning
What a proper professional service should include:
- Whole-system cleaning: ducts, coils, blower motor, drain pans, and registers (not just the ducts alone, since cleaning only the ducts leads to rapid recontamination from dirty coils and blower components)
- Borescope or camera inspection with before-and-after documentation
- Negative-pressure vacuuming with HEPA-filtered equipment
- Written scope of work and post-service report
Red flags when hiring:
- An unusually low bid with no camera inspection offered
- Refusal to show you pre- and post-cleaning photos
- Vague scope of work or bait-and-switch pricing after arrival
- No mention of NADCA certification or equivalent professional standard
Professional duct cleaning typically incurs a moderate cost for a standard home, according to industry how-to resources. That cost is justified when contamination exists. For routine maintenance without those red-flag conditions, DIY vent cleaning is the right starting point. Check the signs your HVAC needs cleaning before scheduling a service call.
How often should you clean vents and maintain your system?
A consistent schedule keeps dust from building up to the point where it affects airflow or air quality. The right cadence depends on your household.
| Maintenance Task | Baseline Frequency | Adjust If… |
|---|---|---|
| Quick dusting of register faces | Monthly | Pets or high-traffic areas: every 2 weeks |
| Deep clean vent covers | Every 3–6 months | Allergies, pets, or humid climate: every 3 months |
| HVAC filter replacement | Per manufacturer (typically 1–3 months) | Pets or allergies: monthly |
| Professional system inspection | Every 1–3 years | Recent renovation, mold history, or older system: annually |
Factors that shorten the interval:
- Pets that shed (pet dander coats registers quickly)
- Household members with asthma or seasonal allergies
- Nearby construction or renovation work
- High-humidity climates where condensation is common inside ducts
Filter quality has a direct effect on how fast registers get dirty. A higher-MERV filter traps more particles before they reach the ductwork, which means less buildup on covers between cleanings. Pairing good filters with seasonal HVAC maintenance is the most cost-effective way to maintain indoor air quality year-round.
Pro Tip: Tie vent cleaning to your filter change. Every time you swap the filter, take 5 minutes to vacuum the nearest registers. You already have the system off, your hands are dirty, and the habit sticks.
How do you know if you have mold in your air vents?
Mold in ductwork looks different from ordinary dust, and the distinction matters because the response is completely different.
Signs that point to mold rather than normal dust buildup:
- A musty, earthy odor that appears or intensifies when the HVAC system runs
- Visible black, green, or white fuzzy growth near register edges or inside the duct opening
- Respiratory irritation, headaches, or allergy-like symptoms that improve noticeably when you leave the home
- Dark staining around ceiling registers that reappears quickly after wiping
Immediate steps if you suspect mold:
- Stop running the HVAC system. Continued operation spreads spores throughout the home.
- Do not spray bleach or any chemical into the duct opening. The EPA warns against applying biocides to ducts without professional confirmation of mold and a plan to address the moisture source that caused it.
- Document visible growth with photos before touching anything.
- Contact a qualified HVAC professional or indoor air quality specialist for testing and remediation.
Persistent musty odors or recurring dust after cleaning can also indicate other issues: duct leaks pulling unconditioned air from crawl spaces, condensation from inadequate insulation, or a failing air handler drain pan. A camera inspection is the fastest way to triage those possibilities without guesswork. You can also review air quality factors for your health to understand what else may be contributing to symptoms.
What do EPA and NADCA guidance actually say?
Two authoritative sources shape how professionals and informed homeowners approach duct and vent maintenance, and their positions are often misrepresented online.
The EPA’s core position: Routine whole-system duct cleaning is not required and has not been shown to prevent health problems. The agency recommends it only when there is substantial visible mold, evidence of pests, or ducts clogged with excessive dust and debris. Controlling moisture and using quality filters are the primary strategies for maintaining healthy indoor air.
NADCA’s standard goes further on what a professional clean must cover. A proper service addresses the entire HVAC system, including coils, the blower motor, and drain pans, not just the ducts. Cleaning ducts alone without servicing those components leads to rapid recontamination as debris from dirty coils and blower assemblies re-enters the duct system.
What this means for your approach:
- DIY surface cleaning of registers and the first section of ductwork is appropriate and effective for routine maintenance
- Professional cleaning is warranted only when the red-flag conditions above are present
- When you do hire a pro, insist on a camera inspection, written before-and-after documentation, and NADCA-standard whole-system coverage
- Indoor activities like cooking, vacuuming, and pet activity often contribute more to visible dust on registers than the ductwork itself, per EPA research
Kcaircontrol’s recommendation, backed by more than 70 years of HVAC experience in the Kansas City area: follow the DIY steps in this guide for routine maintenance, and schedule a professional inspection if you encounter any of the red-flag conditions. For a deeper look at what a professional duct cleaning workflow involves, that resource walks through the full process step by step.
Key Takeaways
Clean vents start with turning off the HVAC, removing covers, vacuuming the duct boot, washing and fully drying covers, and replacing the filter on a consistent schedule.
| Point | Details |
|---|---|
| Turn off HVAC first | Always switch the thermostat to OFF and kill the air handler breaker before removing any register. |
| Focus on the duct boot | The transition between register and duct traps the most dust; vacuum it thoroughly with a brush attachment. |
| Dry covers completely | Never reinstall a damp cover; residual moisture promotes mold growth when the system cycles. |
| Call a pro for red flags | Visible mold, pest activity, standing water, or heavy matted debris require professional tools, not DIY cleaning. |
| Kcaircontrol for professional service | Kcaircontrol provides whole-system duct cleaning with camera inspection and NADCA-standard processes for Kansas City homeowners. |
What technicians actually see homeowners get wrong
The most common mistake is cleaning only the visible face of the register and calling it done. Wiping the front louvers removes surface dust, but the duct boot directly behind the cover holds far more buildup and is the spot that actually affects airflow. A quick wipe of the face does almost nothing for air quality.
The second most common issue is reattaching covers before they are fully dry. Homeowners rinse a cover, shake it off, and put it back while it is still damp. Within a few HVAC cycles, that moisture creates the exact conditions mold needs to establish itself.
A few small habits make a real difference over time. Label your registers with painter’s tape before you remove them so reinstallation is fast and accurate. Change your HVAC filter on a fixed calendar date rather than waiting until you notice reduced airflow. Check for air leaks around duct connections in accessible areas like the basement or attic, because leaky ducts pull in unconditioned air and accelerate dust buildup on every register in the house. These are the habits that reduce service calls, and they cost nothing but a few minutes of attention.
Kcaircontrol handles what DIY can’t reach
When your inspection turns up mold, heavy debris, or a system that hasn’t been professionally serviced in years, surface cleaning is not enough. Kcaircontrol’s duct and vent cleaning service covers the whole HVAC system: ducts, coils, blower motor, drain pans, and registers, using negative-pressure vacuuming and HEPA-filtered equipment. Every job includes a camera inspection with before-and-after documentation so you can see exactly what was found and what was cleaned.

That level of service matters because cleaning ducts alone without addressing the coils and blower leads to rapid recontamination. Kcaircontrol’s team brings more than 70 years of local HVAC experience to every job in the Kansas City area, and the process follows NADCA standards from start to finish. If your system needs more than a DIY clean, schedule your HVAC maintenance with Kcaircontrol or visit the duct cleaning service page to request a camera inspection and get a clear scope of work before any service begins.
Useful sources and next steps
Use these resources to go deeper on any topic covered in this guide.
- EPA: Should You Have the Air Ducts in Your Home Cleaned? The primary federal reference on when duct cleaning is and is not warranted, including guidance on biocides and moisture control.
- NADCA: Proper Cleaning Methods The industry standard for what a professional whole-system clean must include, and how to verify a contractor meets that standard.
- Kcaircontrol: How to Clean Air Ducts An extended homeowner guide covering duct cleaning scenarios that require professional tools and inspection.
- Kcaircontrol: Signs Your HVAC Needs Cleaning A practical checklist of system-level warning signs that go beyond what you can see at the register.
- 7 Signs Your Air Ducts Need Cleaning A third-party overview of duct-condition indicators that many homeowners overlook.
- Indoor Air Quality Guide Broader context on filters, humidity control, and air purification options that complement regular vent cleaning.
Your next step: Pick one vent in your home today, remove the cover, and photograph the duct boot with your phone. That single inspection tells you more about your system’s condition than any checklist, and it takes less than five minutes.